
Do I need a concrete gate pad for my pool fence gate?
Only if the gate has to go in grass, dirt or landscaping. A self-closing pool fence gate needs something solid under its two posts, and soil isn’t solid. If your gate will sit on concrete, pavers or natural stone you’re already set and can stop reading here. If the only place a gate really makes sense is out in the lawn, you’ve got two ways to handle it.
Why the gate is different from the rest of the fence
The fence itself is fine in dirt. Each pole goes into a PVC ground sleeve set in a small concrete footing and that’s all it needs (see Can you install a pool fence in dirt?). The gate is pickier. A self-closing, self-latching gate swings shut on its own and has to land on the latch in the same spot every time. If either gate post moves even a little, the latch starts missing. Posts drilled into a patio don’t move. Posts set in soil do, as the ground settles through a season or two of watering and weather, and you end up with a safety gate that doesn’t latch.
Option 1: use the U-Safe gate kit (no pad needed)
The U-Safe self-closing gate kit is the exception to the rule. Its U-shaped frame sets into two concrete footings, one under each leg, so it can go straight into grass or dirt without a pad. It’s the only All-Safe gate that works in the landscaping. Right now the U-Safe is made in 4 ft Combo E Black with Peg poles, and a 5 ft version is on the way. If that matches your fence, this is the easiest route by far.
Option 2: pour a concrete gate pad
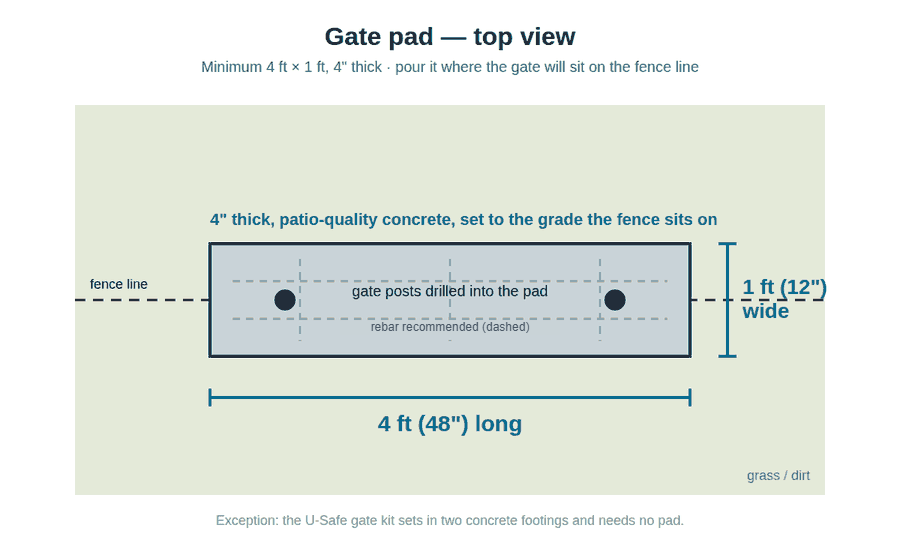
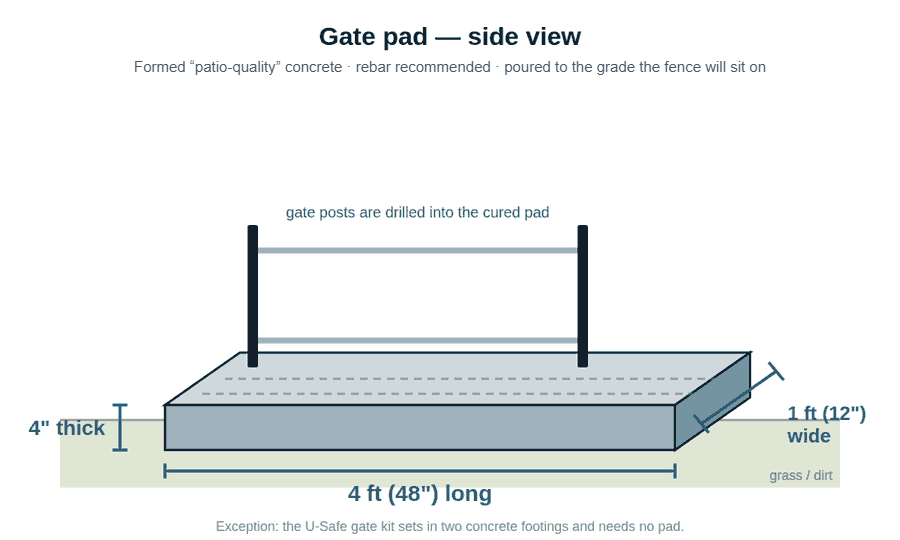
Any other gate going into grass or dirt needs a pad poured first. That includes the self-closing gate kit with rectangular posts and any gate you build from a frame, a pair of gate posts and a hinge and latch kit. Once the pad has cured you drill the gate posts into it exactly the way you would into a patio. Here is what the pad needs to be:
- Size: 4 feet (48″) long, 1 foot (12″) wide and 4 inches thick. That’s the minimum. Going a bit bigger doesn’t hurt.
- Concrete: a formed, “patio quality” pour, and put rebar in it. Our install team’s advice is to always add rebar: a 4-inch pad this size cracks too easily without it, and a cracked pad means a gate that stops lining up. Run the rebar the length of the pad, set in the middle of the pour. (The diagrams label it optional; treat it as strongly recommended.)
- Height: bring the top of the pad up to the grade the fence sits at, so the gate lines up with the sections on either side of it.
- Placement: center the pad on your fence line right where the gate will hang. Settle on the gate location before you pour, because there’s no moving it afterwards.
- Cure time: give the concrete its full cure before you drill for the posts.
Who pours it?
It’s a small, simple pour. Most DIY customers do it themselves over a weekend, or have a concrete guy knock it out. If an All-Safe reseller is putting in your fence, ask them about it. Many will pour the pad as part of the job, and if a pad they poured were to crack while drilling, they’d remake it. If you pour your own and it cracks during drilling, a new one has to be made at your cost, which is the main reason to stick to the specs above. A pad built to spec very rarely cracks.
A few things worth knowing
- Put the gate on a straight stretch of fence rather than on a turn. Gates on corners tend to fight you on alignment.
- Before you commit to a pad, walk your layout once more. If you can route the fence so the gate lands on existing hardscape where people already walk into the pool area, you skip the pad entirely and get the simplest install.
- The latch pull knob should end up 54″ off the ground, so factor the pad height into that.
Not sure which gate fits your yard, or whether you even need a pad? Send the office a couple of photos and your measurements by email through our contact page, or start a chat on the site, and we’ll tell you exactly what you need.