How Can We Help?

Search for answers or browse our knowledge base.

Print

How to Replace Pool Fence Mesh – Full Sections and Cut Panel Repairs

Overview

Over time, pool fence mesh can become damaged from pets, yard tools, or general wear. Whether you need to replace a full section or repair a smaller panel, this guide will walk you through the process of restoring your removable mesh pool fence to like-new condition.

All-Safe’s Hampton Mesh (5×7) and Malibu Mesh (10×10) are among the toughest in the industry and compatible with most major mesh fence brands. Both are available in 4-foot and 5-foot heights and come in 15-foot rolls.

Shop Replacement Materials


Shop Pool Fence Replacement Mesh Rolls »

Shop Section Screws »

Shop Fence Moldings »

Shop Section Latches & Quick Lock Latches »

Tools You’ll Need

  • Replacement mesh (Hampton or Malibu)
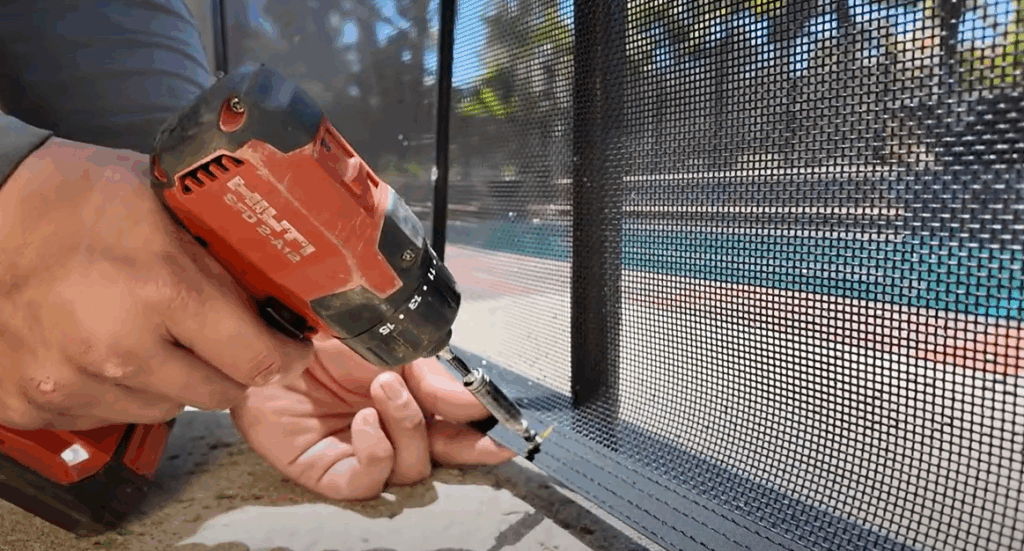
  • Cordless drill
    • Use a #2 Phillips bit for Classic poles
    • Use a #2 Square Drive bit for Ultra poles
  • Tape measure
  • China marker or grease pencil
  • Utility knife
  • Sharp scissors
  • Tarp or cardboard (to protect poles while working)

Step-by-Step Instructions

Part 1: Replacing a Full 15-Foot Mesh Section

This is the most straightforward repair.
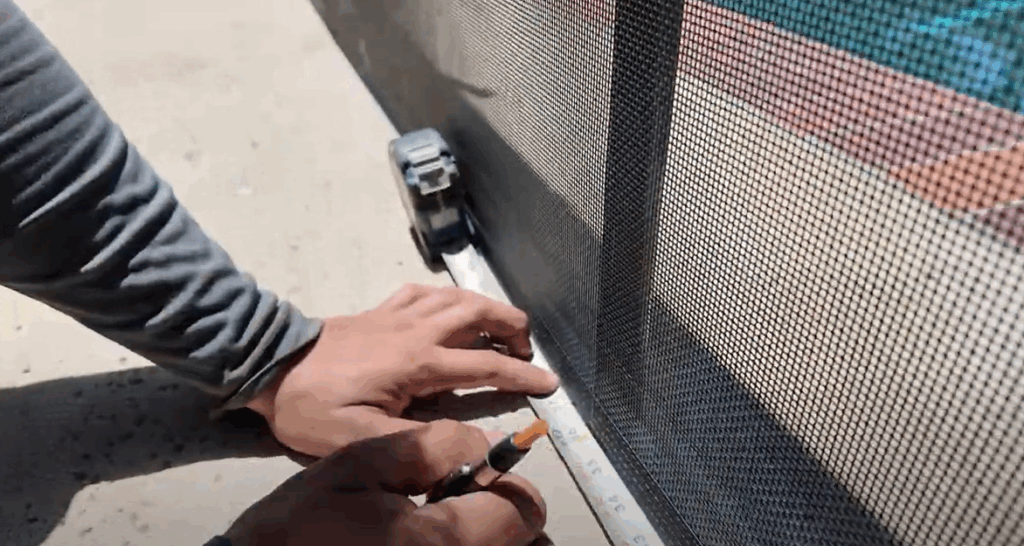
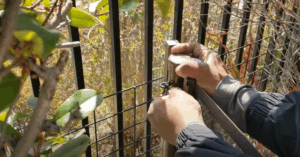
1. Remove Old Mesh

Installer unscrewing moldings.

Unscrew the moldings from each pole.


Installer removing mesh from fence.

Remove and discard the damaged mesh.


2. Attach Mesh to First Pole

Installer setting materials on the ground.

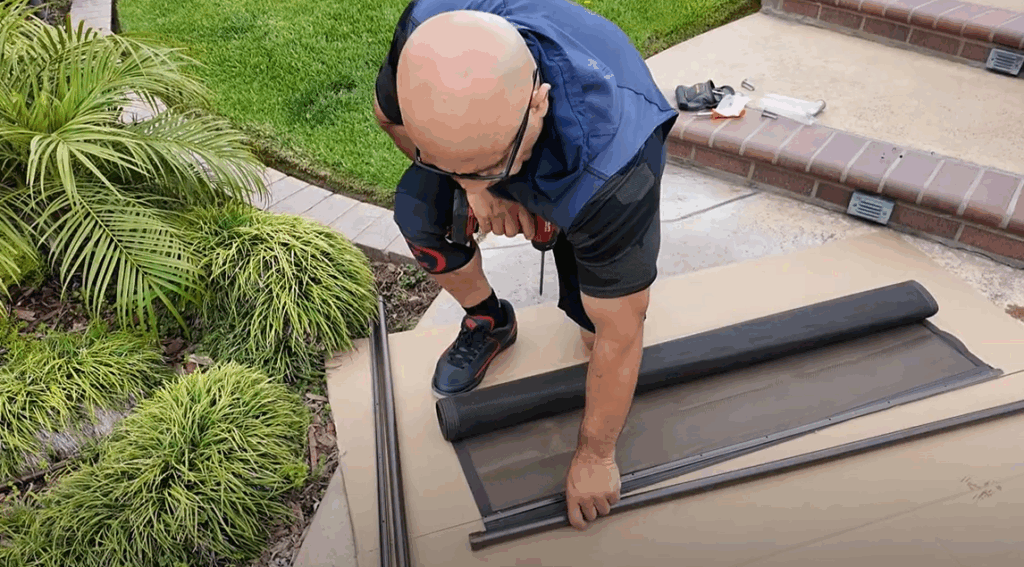
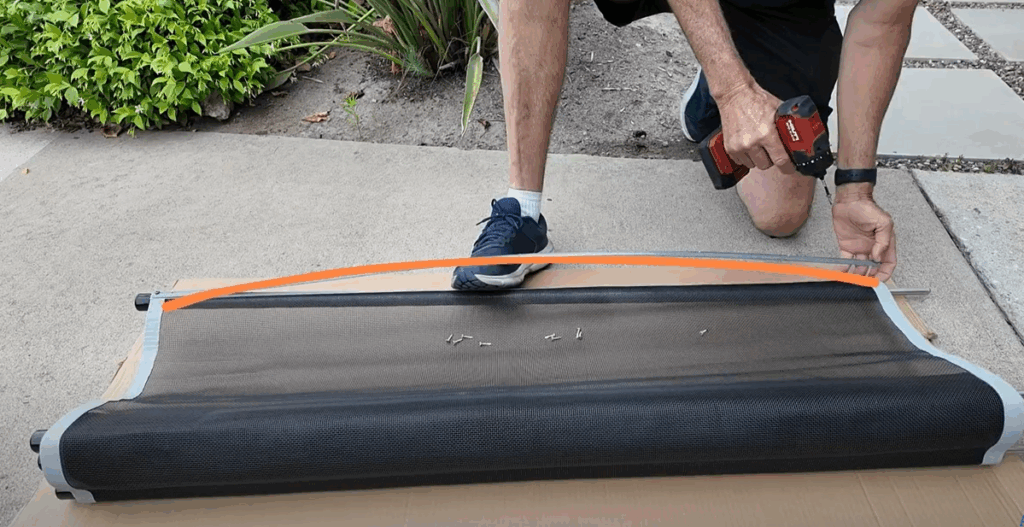
Lay the pole flat on the ground (recommended).


Example of how to align molding to top of border.

Align the top of the molding with the top of the border.


Installer inserting the top screw through the molding and top border.

Insert the top screw through the molding and top border.

Then screw the mesh and the molding to the pole.


Installer using the "foot method" to stretch the mesh.

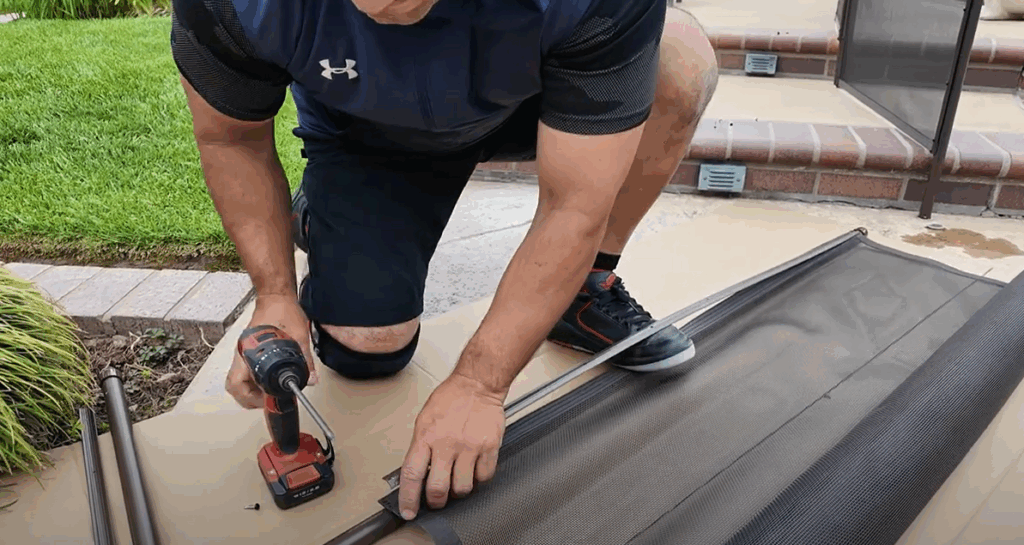
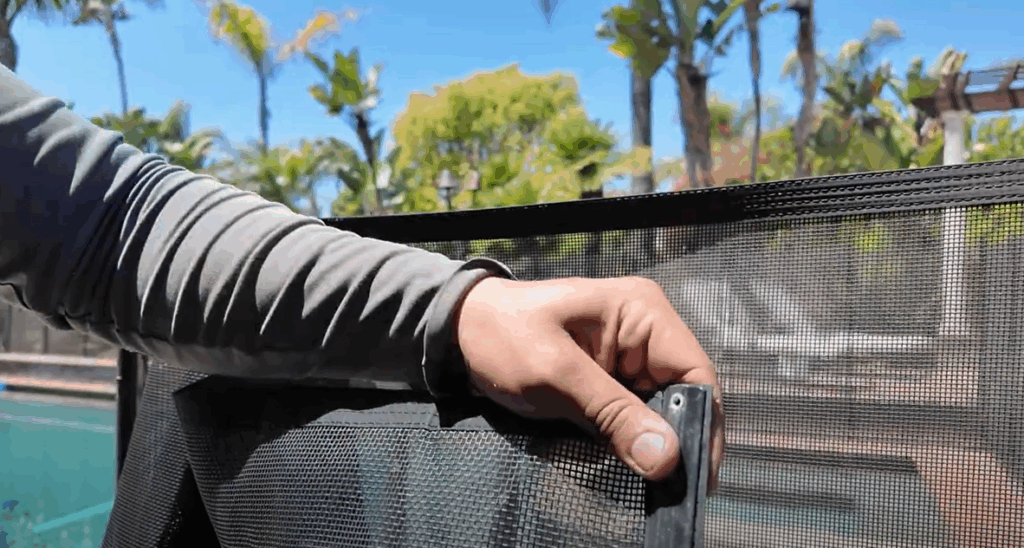
Use the “foot method” to stretch the mesh:

Releasing your foot will stretch the mesh tight.

Place your foot between the molding and mesh.

Press down to bow the molding, then screw in the bottom.


Installer screwing holes into molding and pole.

Screw in the remaining molding holes.


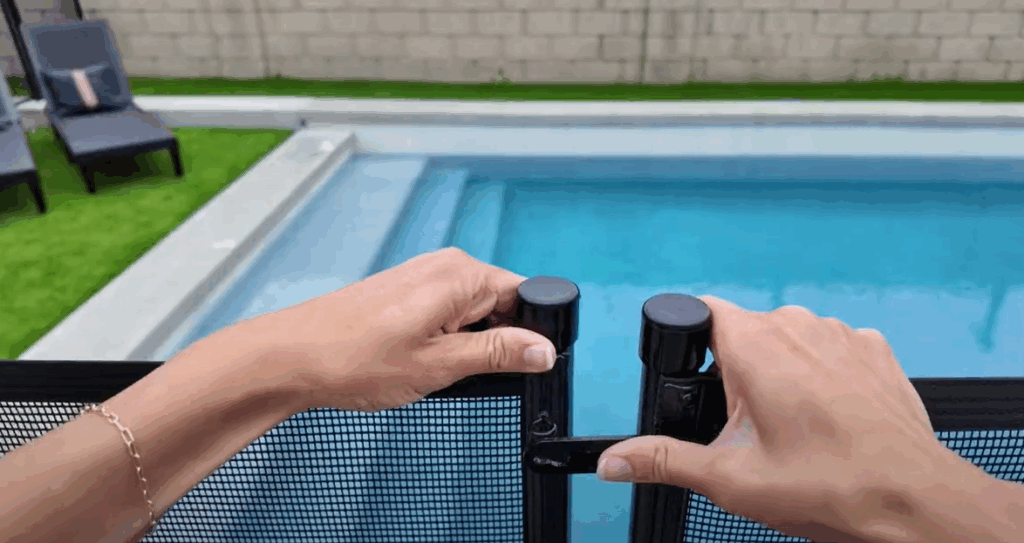
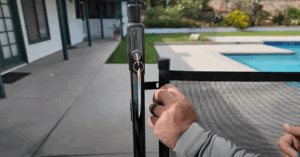
3. Set First & Last Poles into the Deck

Installer inserting poles into pool deck.

Insert the first and last poles into the deck.


Installer using section latch to secure fence.

Secure the poles using Section Latches or Quick Lock Latches.


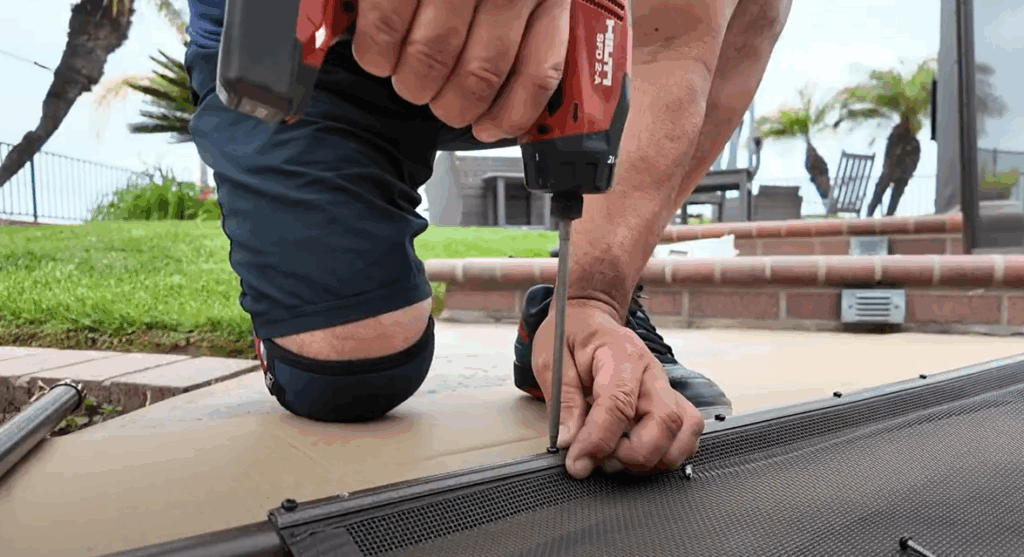
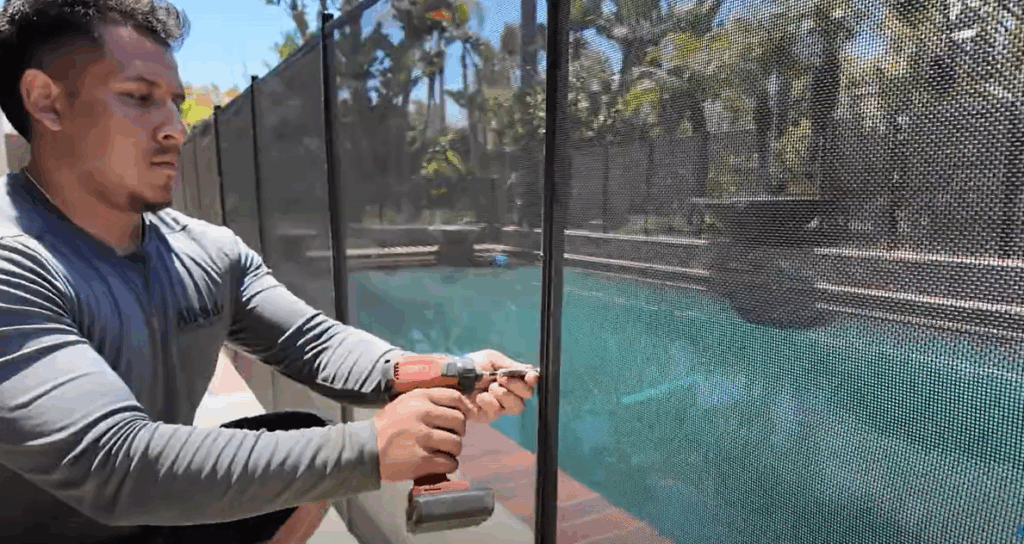
4. Attach Remaining Poles

Installer measuring and marking border.

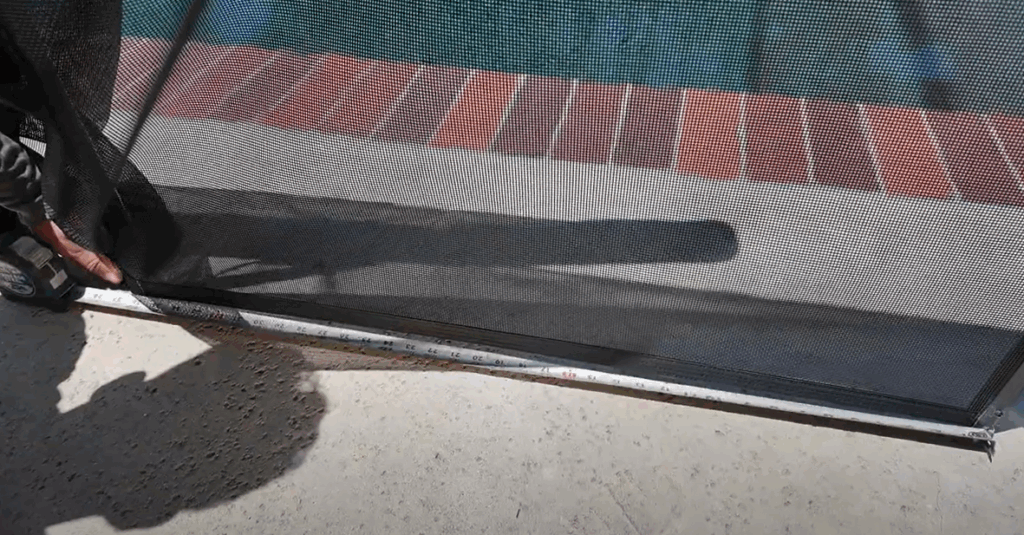
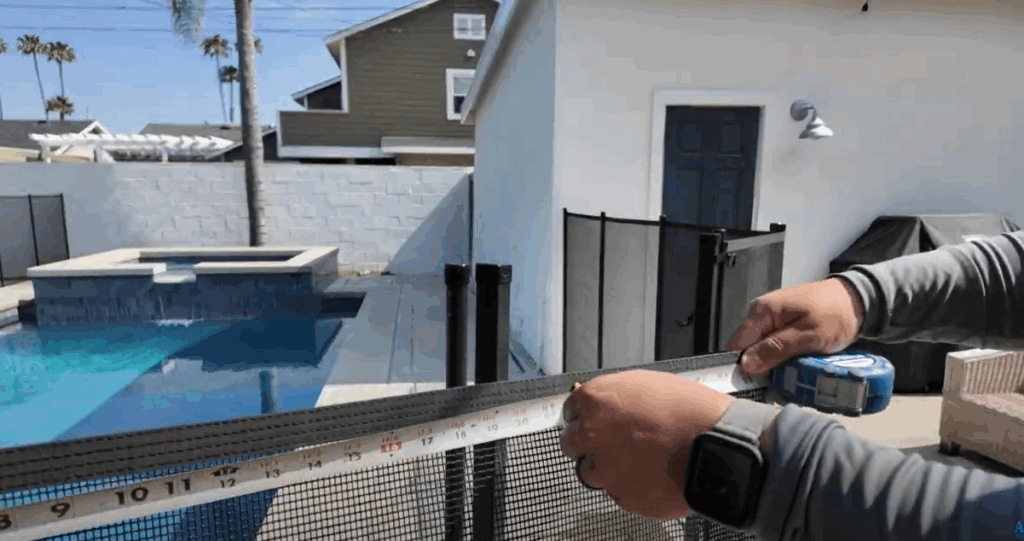
Measure and mark the border location on the second pole.


Installer pre-screwing the molding

Pre-screw the molding through the top border first.


Installer pre-drilling hole in bottom of mesh border

Pre-drill the bottom border and repeat the bowing method to stretch the mesh.

Screw the bottom of the molding into the pole.

Repeat drilling top and bottom screws into all the poles in the section. Don’t insert other screws yet.


5. Finalize Full Section Repair

Person using Quick Lock Latch.

Ensure the section is latched at both ends.

Double-check wall attachments, gate trusses, and terminal points.


Installer screwing moldings into fence.

Insert the remaining screws into all moldings.


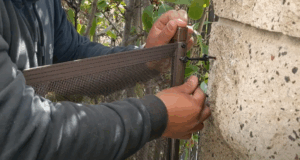
Part 2: Replacing a Cut Panel (Less Than 36 Inches)

Shorter panels require a cut method. Be sure to watch our “Cuts” video series » to determine the best technique for your skill level.

1. Start from the Factory Edge

Hand holding molding and end of mesh panel.

Identify and use the pole with the factory-finished border first.

Unscrew moldings and remove mesh.


Installer using the foot method to stretch mesh.

Use the foot method again to stretch and attach the mesh.


2. Pull Mesh to Next Pole

Installer measuring mesh.

Slide the first pole into the deck and latch it.

Wrap mesh tightly around the next pole and mark both borders.

Use the same measure-mark-screw method described above.


3. Attach and Trim for Fit

Installer measuring and marking mesh.

At the short panel area, choose your Cut method.

Mark and trim the mesh as needed.


Installer shown inserting screws.

Secure mesh using predrilled holes and bowed molding technique.

Once fit is correct, finish the section by inserting remaining screws.

Pro Tip: Be cautious when using sharp screws and tools. Section screws should go into the mesh—not your fingers!

Final Check

  • Confirm all poles are secure and all screws are installed.
  • Check gate operation and fence tension.
  • The fence should look clean, tight, and safe—just like new.

Repaired right. Safe again. That’s the All-Safe way.

Watch: Mesh Cutting Techniques – “Cuts” Video Series »

Read: How to Replace Pool Fence Gate Mesh »

Shop Pool Fence Replacement Mesh Rolls »

Shop Section Screws »

Shop Moldings »

Shop Section Latches & Quick Lock Latches »

Was this article helpful?
0 out of 5 stars
5 Stars 0%
4 Stars 0%
3 Stars 0%
2 Stars 0%
1 Stars 0%
5
Please Share Your Feedback
How Can We Improve This Article?
Table of Contents

Get Started!

Enter in your zip code to let us know where your pool is located.

Color Variations

Colors on your screen or brochure may not match the actual color of your product.

Due to the many variations in monitors, phones, and browsers, color samples and product examples may appear different on different screens. Computers and mobile devices are not all calibrated equally and color reproduction on the Internet is not precise. The same is true for printed items such as brochures and other sales literature. 

In addition, the colors of our products photograph differently under different lighting conditions. For example, photos taken in full sunlight will vary from photos taken on a cloudy or overcast day. Similarly, shadows from nearby objects can affect the color and transparency of our products. If a precise color or specific shade is important, please inspect the actual color of your product prior to installation.

Colors will vary from batch to batch.

Many of our products’ materials are not available through typical stores and vendors and therefore must be custom manufactured specifically for our use. In order to control costs and provide you with the best value possible, our raw materials are produced in large batches and can often take several months to receive. The colors of our materials can, and often do, vary slightly from batch to batch. Although we make every effort to minimize color variations, we cannot be responsible for these differences when they occur. If a precise color or specific shade is important, please inspect the actual color of your product prior to installation.

Color names are subjective and may not be what you think the color should be.

For example, we use the name “putty” to describe some of our products. Your idea of the color “putty” may be different than someone else’s idea of “putty”. In addition, products may have the same color name but may not be the exact same color. For example, we have different shades of “black”. Please do not order using color names as your only guide. If a precise color or specific shade is important, please inspect the actual color of your product prior to installation.

Inspect the actual color of your product prior to installation.

If it is important that your product be an exact color or shade, it is highly recommended that you inspect the actual product prior to its installation and address any concerns with your local independent installer. Most independent installers do not offer refunds or accept returns due to color variations.