
Pool Fence Layout Guide: Ideas, Spacing and Where to Put the Gate
A pool fence should sit at least 20 inches from the water’s edge — 24 to 36 inches if you have the room — and most yards use one of four layouts: a straight run across the yard, a full perimeter, a U against a wall, or an L between two structures. This guide walks you through choosing yours in seven steps, from walking the yard to marking the line, and ends at the calculator that turns your layout into a parts list.
- Already have your fence? Skip to the Installation Quick Guide.
- Want a professional to lay it out and install it? Get a free quote — a local installer does all of this for you.
Step 1: Walk the Yard and Pick a Layout Style
Stand where people actually enter the pool area and look at where a fence could start and end. Think about how much room you want inside it, what’s in the way (steps, planters, furniture, raised decks, property fences), and every other way into the pool:
- Doors leading from the house
- Low windows
- Doggy doors
- Side gates or garage entries
Mark a first pass with chalk, rope, or a garden hose so you can see it, and keep it simple: as few turns and sections as you can, and don’t divide the yard more than you need to.
Most yards end up as one of these four layouts.
| Layout | How it works | Best when |
|---|---|---|
| Straight run across the yard | One straight line from one side to the other, leaving the rest of the yard open | You have a wall, property fence, or the house on both sides — the easiest install |
| Full perimeter | Follows the general shape of the pool and surrounds the whole pool area | Open yards with no structures to terminate against |
| U-shape | A house wall or yard fence forms one side; the fence makes the other three | The pool sits along a wall or the property line |
| L-shape | Connects two existing structures — a wall and a property fence — to close off a corner | The pool sits in a corner of the yard |
Straight Run Across the Yard
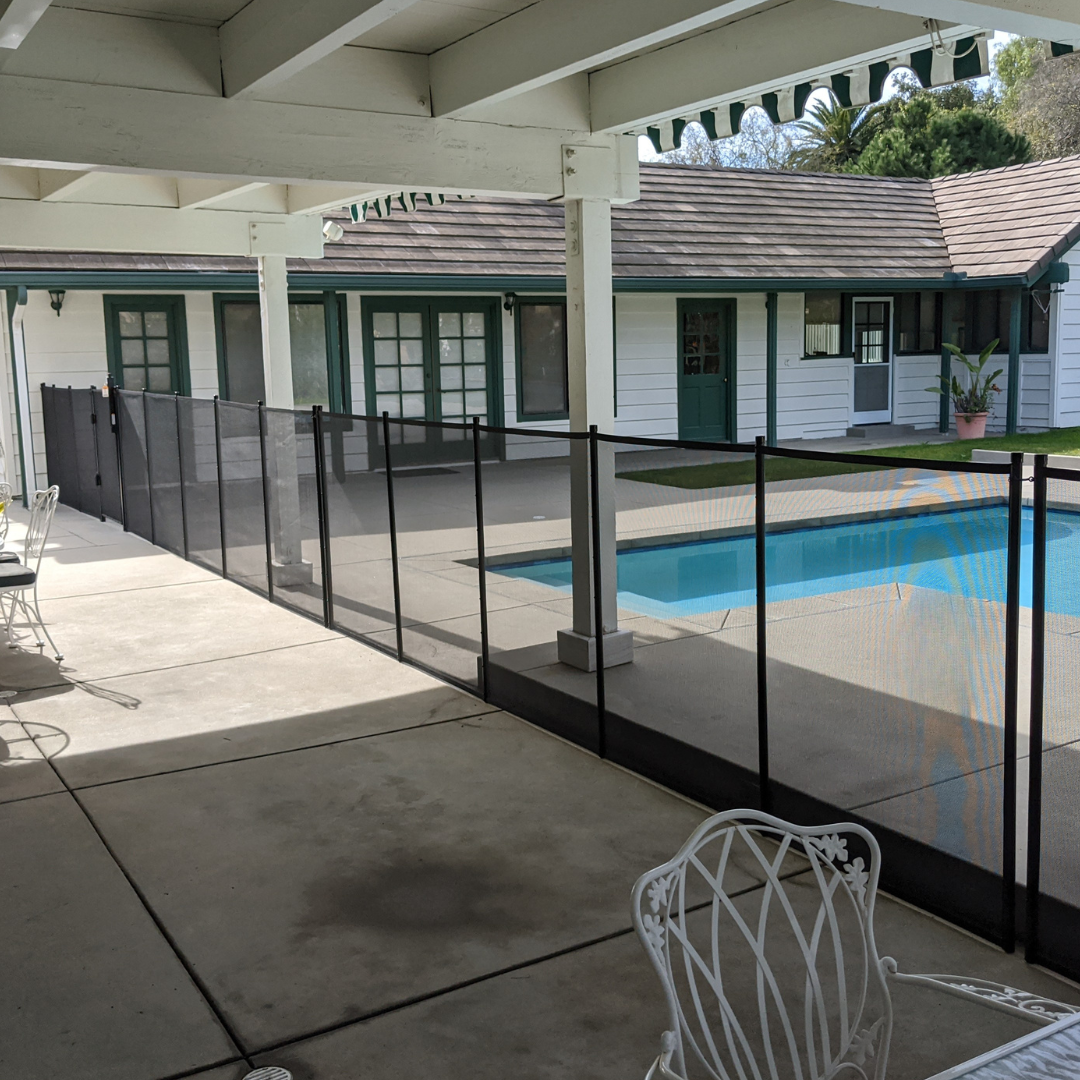
One straight line from one side of the yard to the other, leaving the rest of the yard open. Best when you have a wall, property fence, or the house on both sides — it’s the easiest install, holds tension best, and looks cleanest.

Full Pool Perimeter
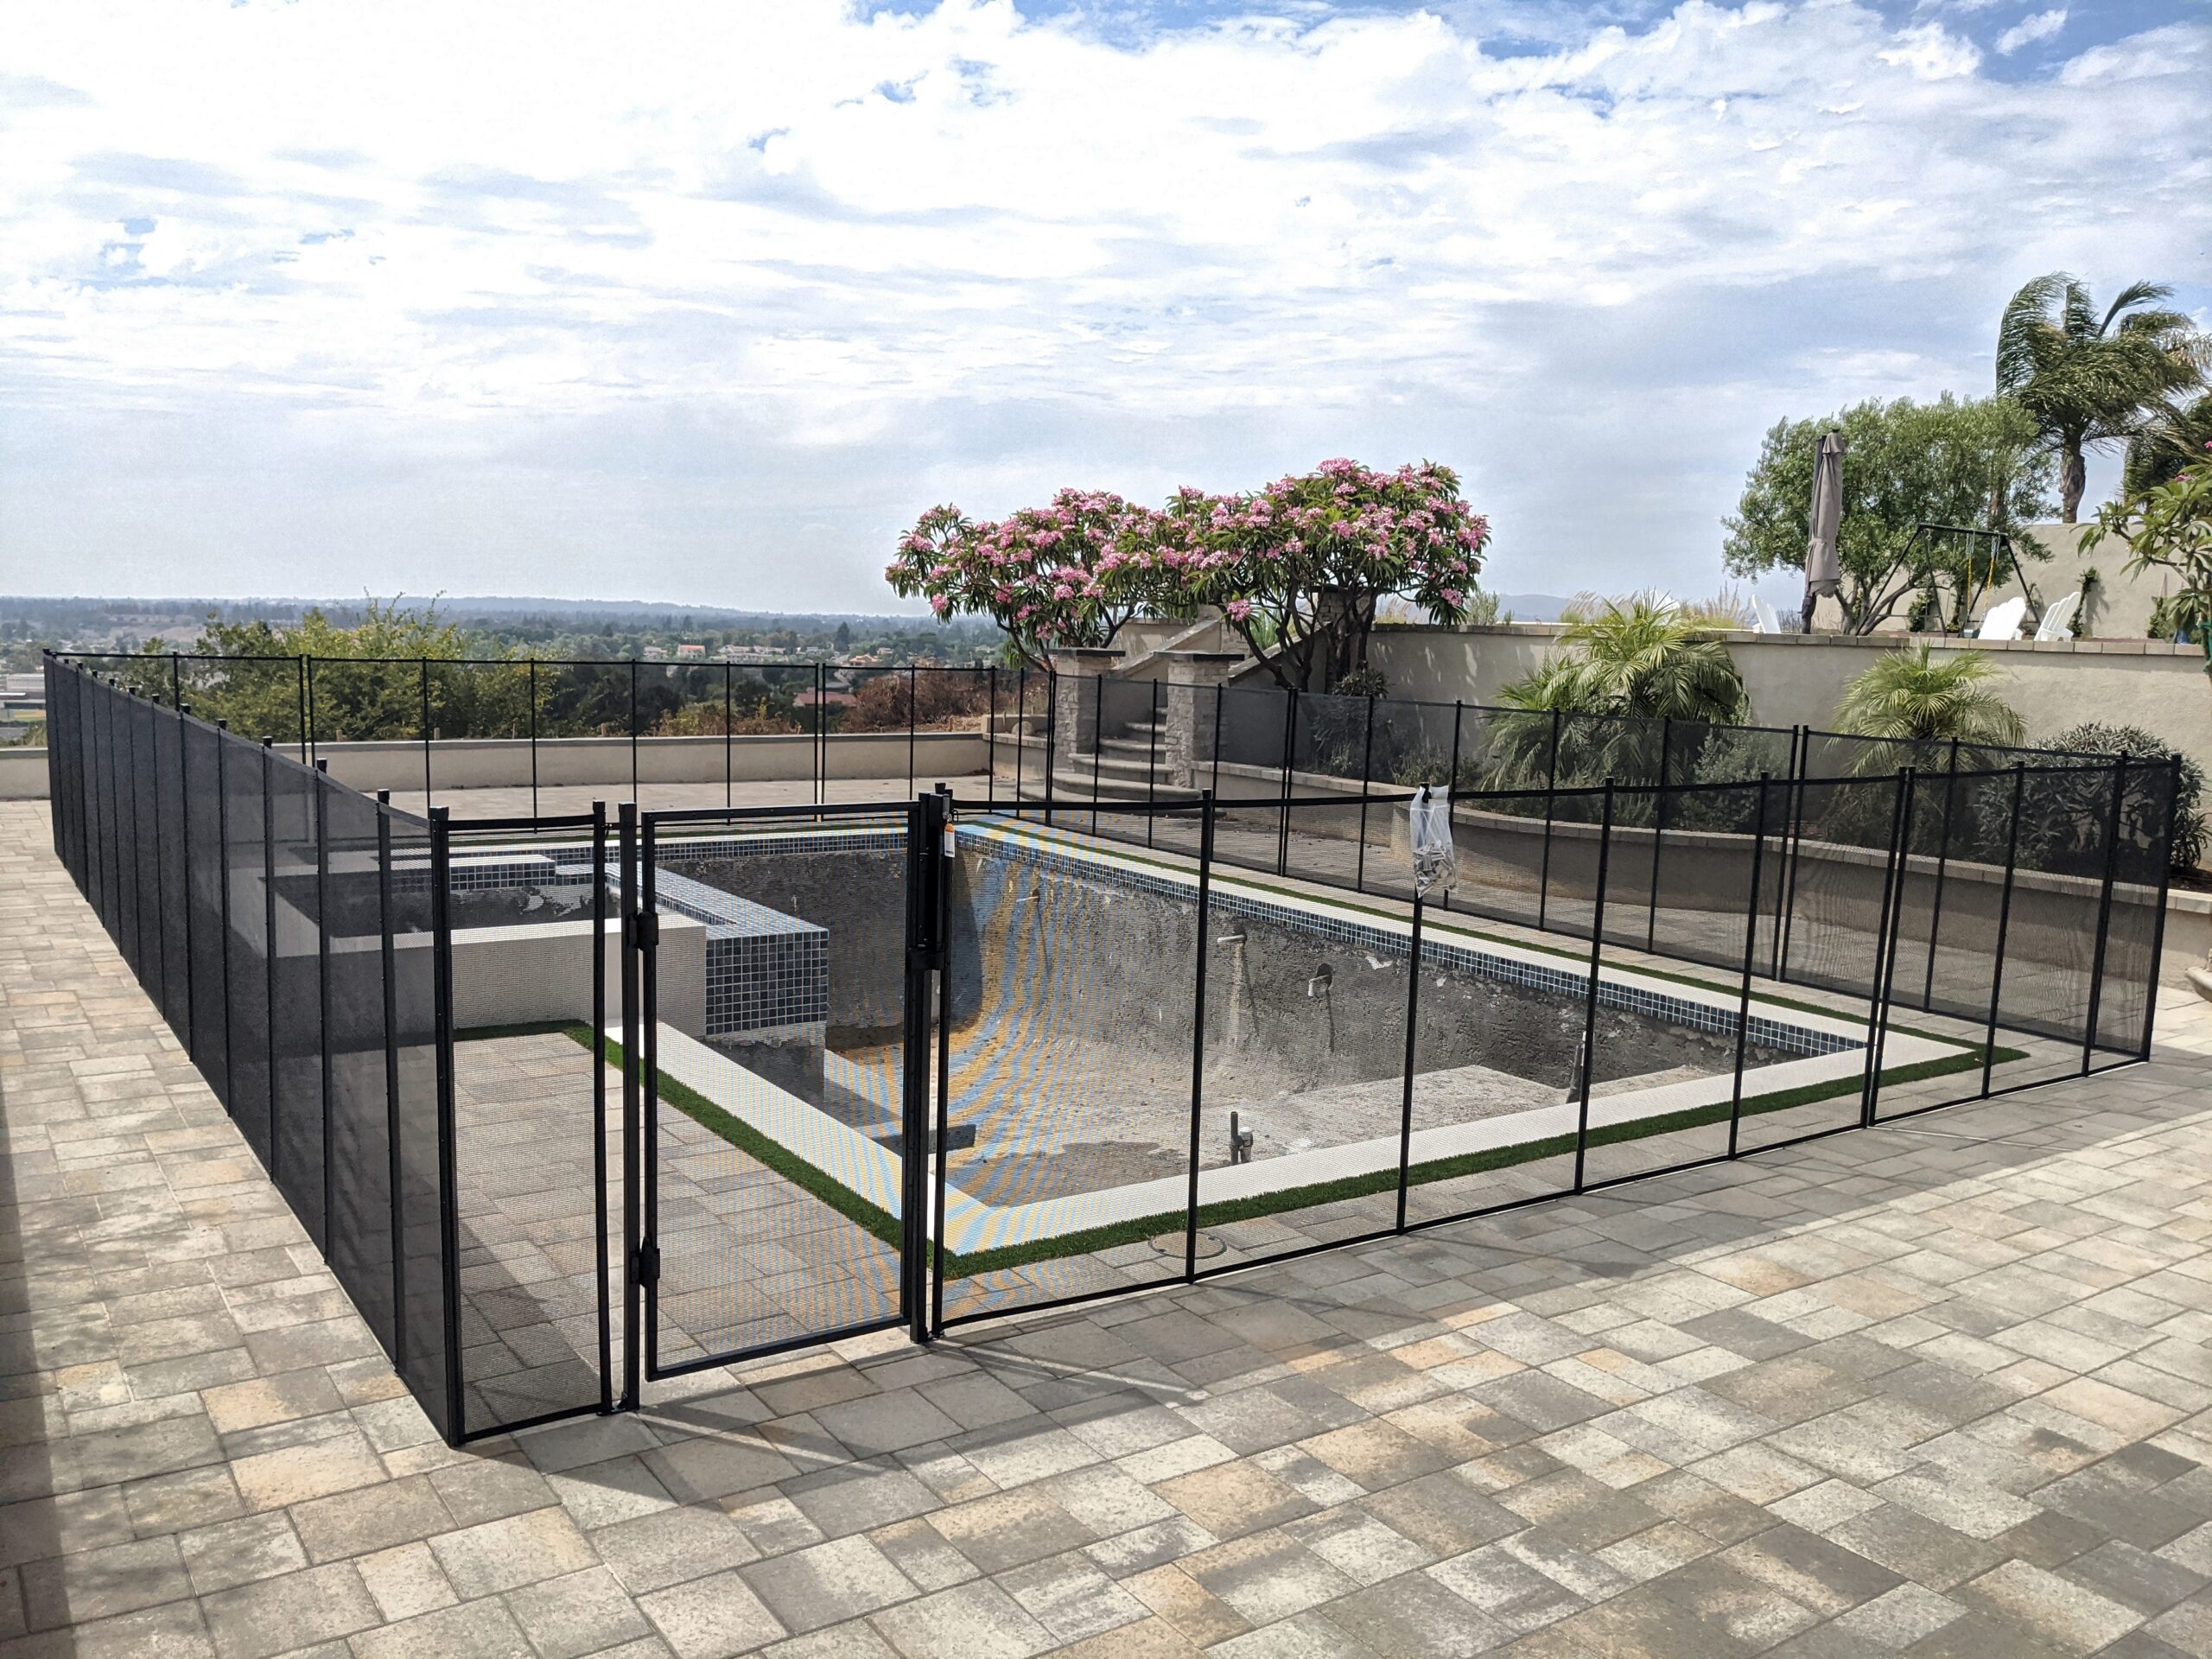
The fence follows the general shape of the pool and surrounds the entire pool area. Best for open yards with no structures to terminate against.
U-Shaped Layout
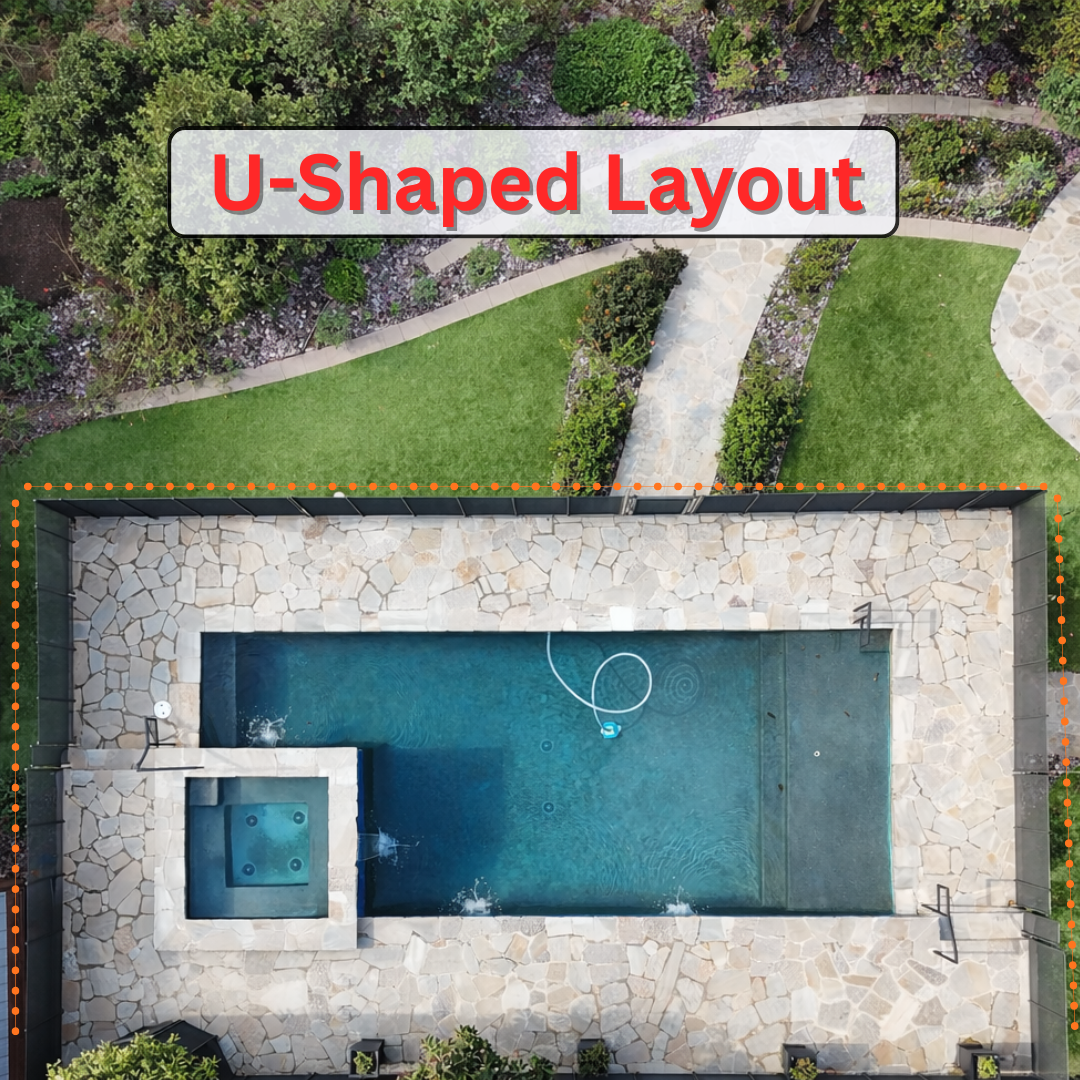
A house wall or yard fence forms one side of the barrier, and the pool fence forms the other three in a “U.” Best when the pool sits along a wall or the property line.
L-Shaped Layout
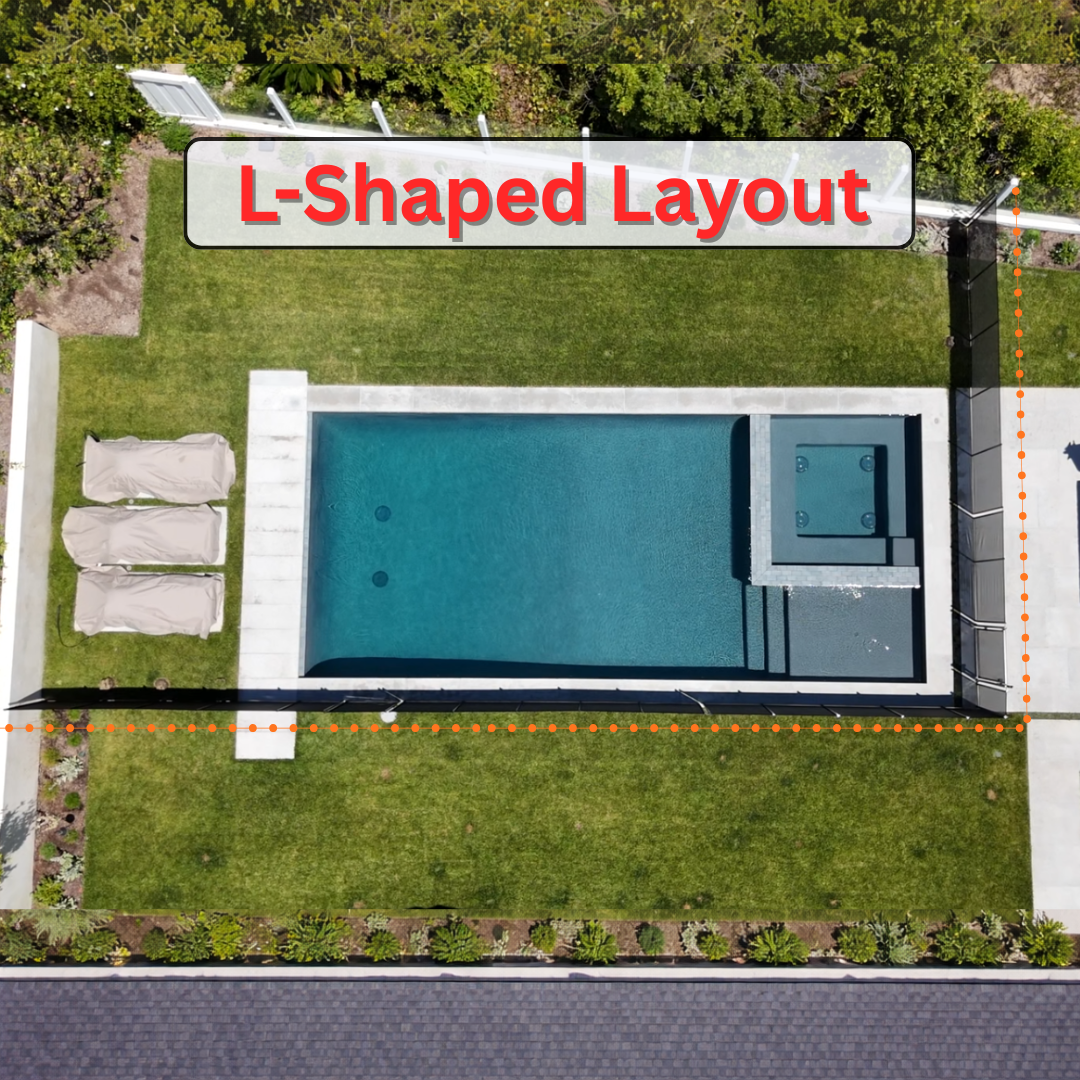
The fence connects two existing structures, like a wall and a property fence, to close off a corner of the yard. Best when the pool sits in a corner.
Choosing the right layout depends on your yard, the space you have, and how you use your outdoor area. Straight runs are the easiest; the other three all work, but every turn is a place where tension gets harder to hold (see Step 4).
Concrete is the best surface for a tensioned mesh fence. Dirt, grass, and turf installations work, but they are less secure, more likely to shift, and harder to maintain, and the gate needs a gate pad or the U-Safe® Gate Kit with two concrete footings. For grass, dirt, or turf, PVC sleeves are set in poured concrete footings.
Step 2: Choose Where the Gate Goes
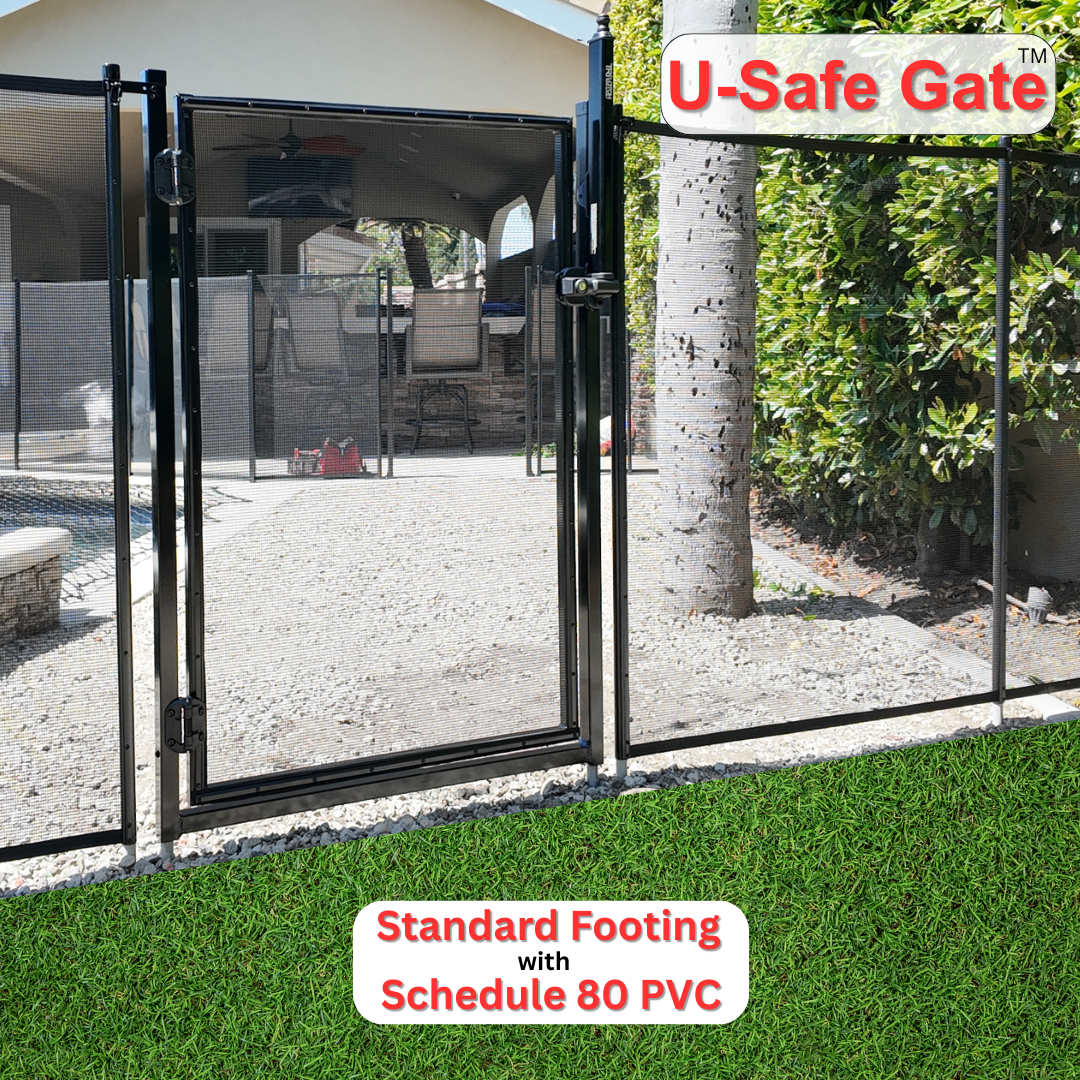
Every pool fence needs at least one self-closing, self-latching gate, and it’s the part of the fence you’ll use most. Put the main gate where people naturally walk in — near the pool steps, off the patio seating area, or on the walkway to the pool — with enough open space on both sides for it to swing freely and for people to enter safely.
Larger yards or pools with several access points can take a second gate. Even then, keep one main gate where you normally enter the pool area.
Two rules that come from how the gate works:
- Put it on a straight stretch. A gate needs a straight line to hang and swing properly — plan for a minimum of 9’ 7” of straight fence around it.
- Put it on hardscape. Drill the gate into concrete, pavers, or another hard surface. On dirt, grass, or turf you need a gate pad, or the U-Safe® Gate Kit, which sits on two concrete footings instead of a full gate pad.

Step 3: How Far Should a Pool Fence Be From the Water?
At least 20 inches from the water’s edge, and 24 to 36 inches or more if you have the room. Twenty inches is the ASTM minimum — any closer and the fence becomes an obstacle for someone getting out of the pool.
Leaving more space inside the fenced area lets you:
- Walk comfortably around the pool
- Perform cleaning and maintenance
- Avoid the fence feeling cramped around the pool
Walk the line at your chosen distance and adjust the chalk or hose from Step 1.
Step 4: Plan the Turns, Curves, and Level Changes
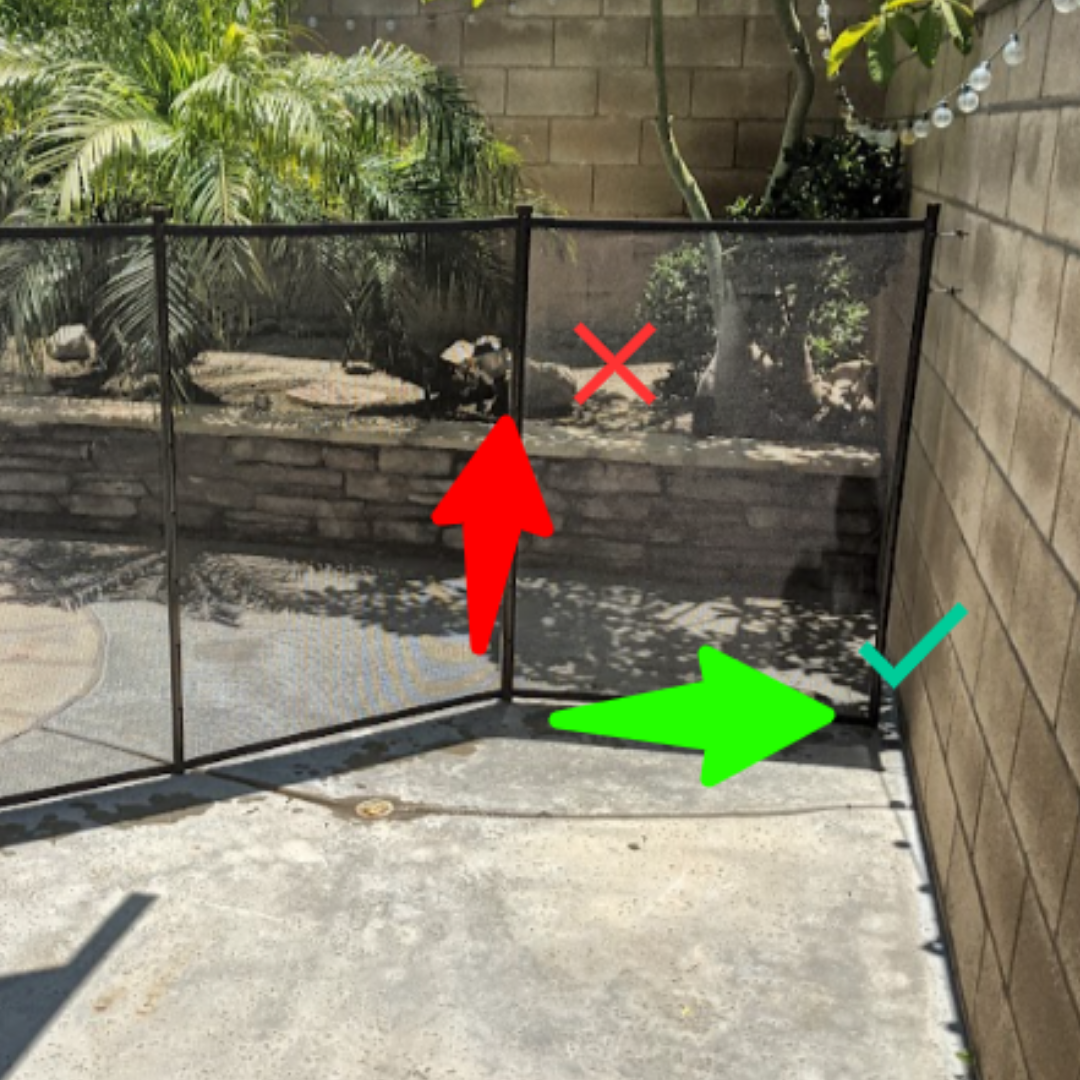
A removable mesh fence works because it’s tensioned from end to end. Straight lines hold that tension easily; every direction change makes it harder. So keep the fence path as simple as your yard allows. When possible:
- Keep fence runs relatively straight
- Avoid zig-zag patterns around small obstacles
- Limit sharp corners or frequent turns
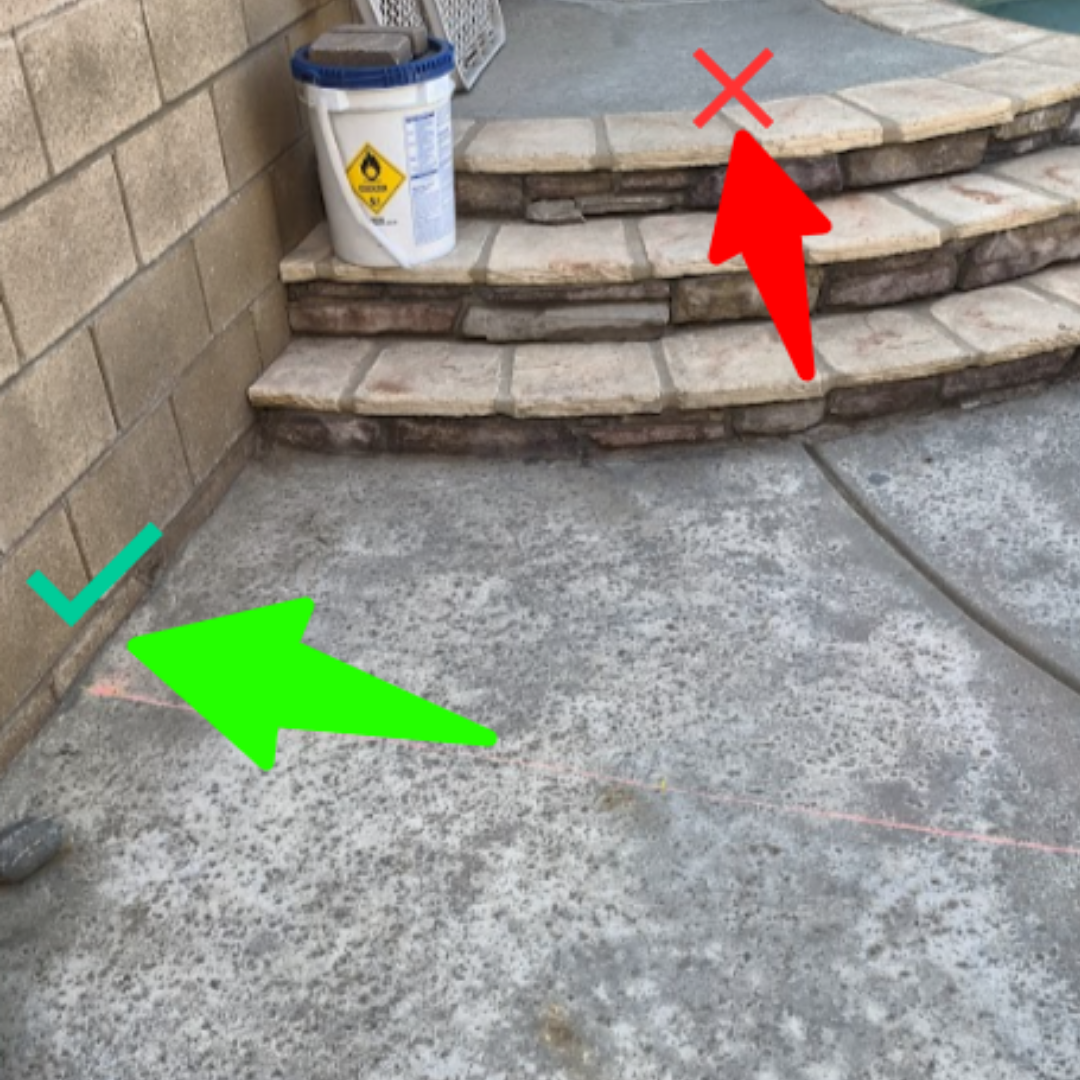
- Avoid placing the fence across steps or large elevation changes

Curved, Kidney-Shaped, and Freeform Pools
The fence doesn’t have to follow every curve of the pool. In most installations it’s better to run the fence in gentle straight sections between the curves rather than matching every contour. This makes installation easier, keeps the fence looking clean, avoids zig-zags, and keeps the tension from pulling in several directions at once.

When the yard does need a turn, the fence handles it three ways: a soft turn for gentle curves, a double-pole corner for 90° turns, or All-Safe’s Corner Post. Which to use, and the exact spacing and drill angles, are covered in the Installation Quick Guide. For now, just mark where each turn falls.
Step 5: Check for Obstacles and Gaps
Walk the line once more looking for two things.
Things in the way, or next to the fence. Common obstacles include:
- Stairs or raised deck areas
- Planters or landscaping features
- Outdoor furniture
- Property fences or walls
Anything climbable near the fence — a bench, a large planter, a storage box — could give a child a way over the barrier, so plan to keep those clear on both sides.
Openings a child could get through or under. General pool safety guidelines include:
- Openings between vertical fence elements should be less than 4 inches
- The space between the bottom of the fence and the ground should be no more than 1 inch
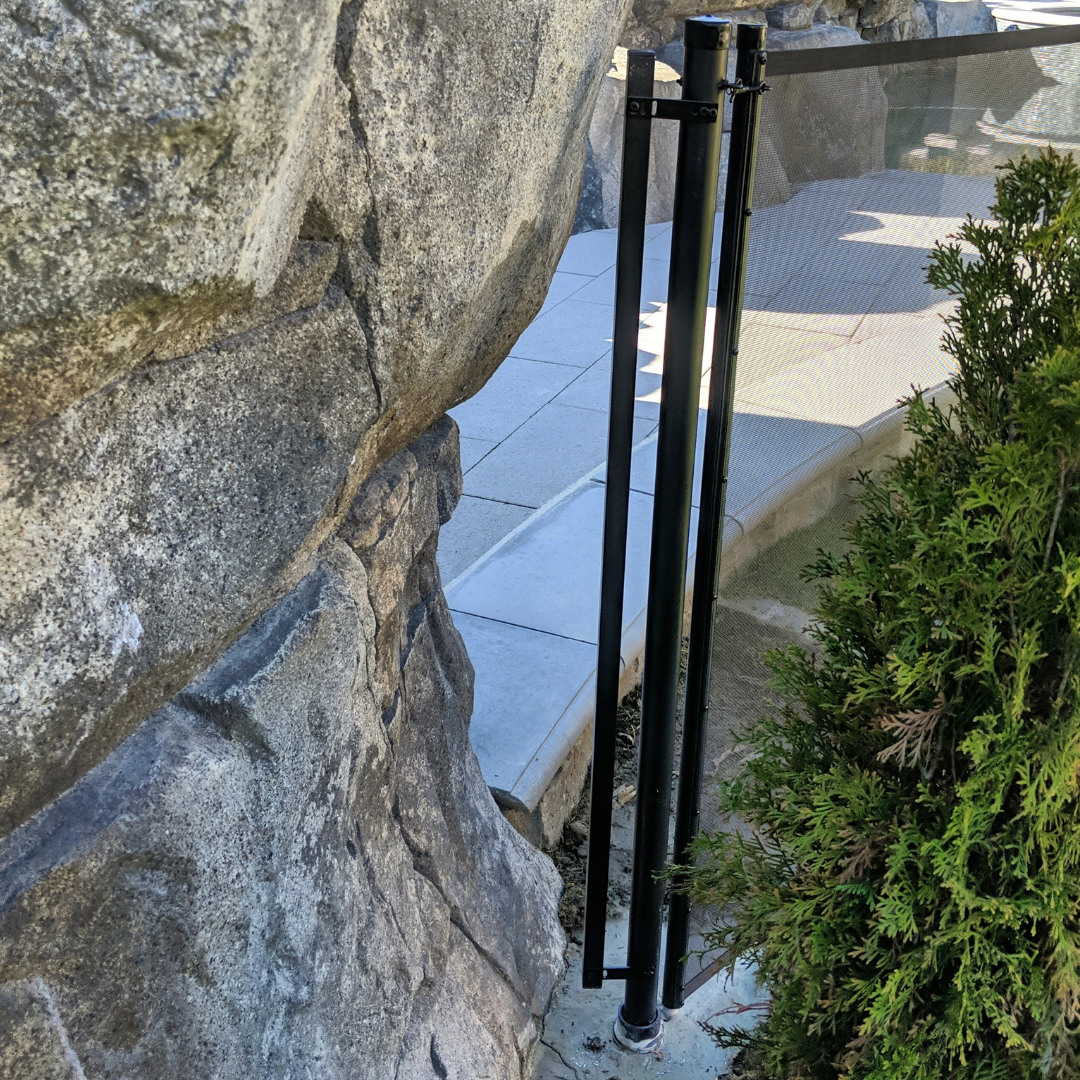
- The fence should connect securely to walls, posts, or other termination points without leaving gaps
Always check your local building codes, as requirements can vary by location.

Step 6: Measure and Estimate How Many Sections You Need
All-Safe® removable pool fence sections come pre-assembled in 15-foot sections, with poles spaced 36 inches apart.
|——15 ft——|——15 ft——| Gate |——15 ft——|
- Walk the full path of your layout and measure the total distance.
- Subtract about 3 feet for each gate opening.
- Divide what’s left by 15 feet to get your section count.
Example: if your layout measures 90 feet and you plan one gate: 90 feet − 3 feet (gate opening) = 87 feet, and 87 ÷ 15 ≈ 6 fence sections. Your final section is often trimmed to fit during installation so the fence ends cleanly at a wall, post, or termination point — that’s normal.
Most installations include one self-closing, self-latching gate; larger yards or multiple entry points may include more. For the exact list — sections, gate quantities, turns, wall connections, and the extra parts — read the DIY Pool Fence Materials & Calculation Guide, or let the DIY Pool Fence Calculator build it from your layout.
Step 7: Sketch It and Mark It
Draw the layout with your measurements on it, then put the real line on the deck with a tape or chalk line. Walk it one last time and confirm:
- The fence has enough space around the pool
- The gate is in the best location, on a straight stretch
- The fence runs smoothly without sharp angles you can avoid
- Obstacles and gaps have been dealt with
Taking the time to plan your layout carefully will make the installation much easier and give you a better-looking finished fence. Whether you’re doing it yourself or working with a pro, the better the plan, the better the result.
Use the DIY Pool Fence Calculator
Pro Tip: Choosing a Fence Color
Dark mesh fencing is the most popular option because it visually disappears when viewed from a distance, providing the clearest sightline to the pool. Lighter fence colors can look great when matched with your patio, deck, or landscaping; however, lighter mesh reflects more light, which makes the fence slightly more visible and less transparent than darker colors. When choosing a color, consider both the style of your yard and how important visibility to the pool area is for you.
What’s Next
- Turn this layout into a parts list: DIY Pool Fence Calculator or the Materials & Calculation Guide
- Order your fence: Shop DIY Pool Fence Products
- Install it: start with the Pool Fence Installation Quick Guide, then the guide for your gate — Rectangular Post Gate System, Double Pole Gate Post System, U-Safe® Pool Gate System, or Fence Only (no gate)
- Have a professional do all of it: Get a free installation quote
Planning to install the fence yourself? The DIY Pool Fence Guide walks through the full process, including tools, installation steps, and product options.
Still Have Questions?
We’re here to help. If you’re not sure about your layout, email a photo or a sketch of your yard to [email protected], or use the chat feature during business hours, and we’ll talk it through with you. Prefer to have it done for you? Find a local installer for a free quote.