
Self-Closing Gate Kit with Rectangular Posts
Introduction
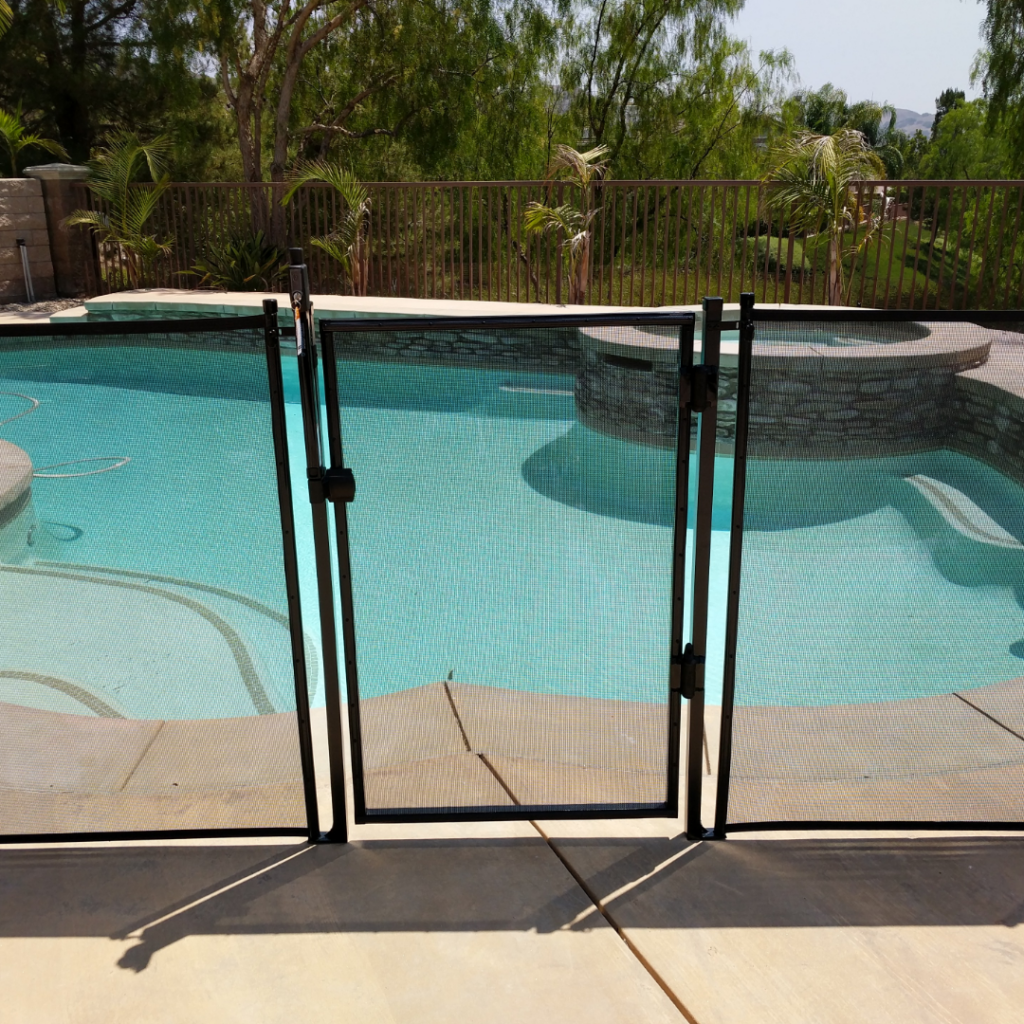
We’ll walk you through the unboxing and assembly of the Rectangular Post Gate Kit. This kit includes everything you need to install a gate with a sleek and modern design.
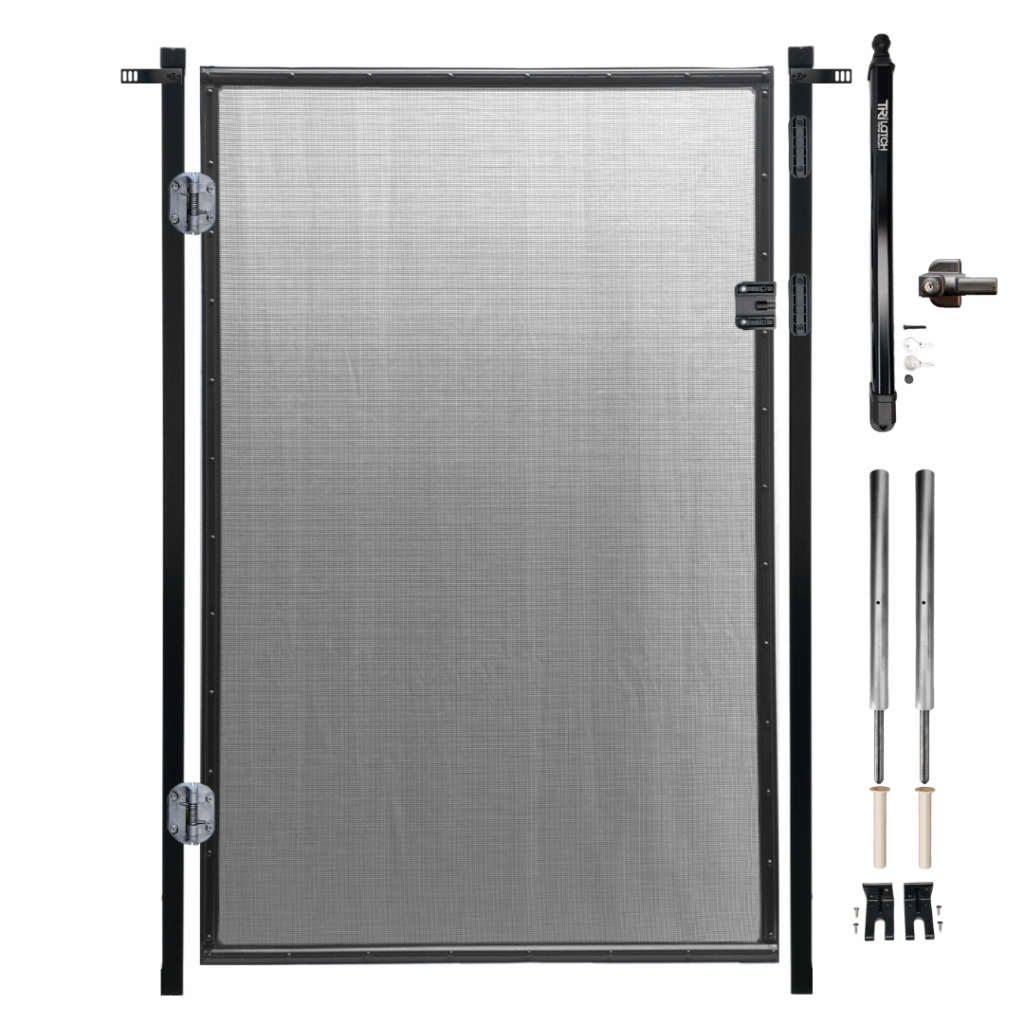
Parts
The Rectangular Post Gate Kit includes the following components:
- Flange
- Deck Sleeves
- Deck Plugs
- Rectangular Brackets
- Quick Links
- Eye Screws
- 1-inch Black Screws
- 1/2-inch Screws
- Trilatch
- Hinges
Need to buy a Kit? You can shop online, Click Here to Shop
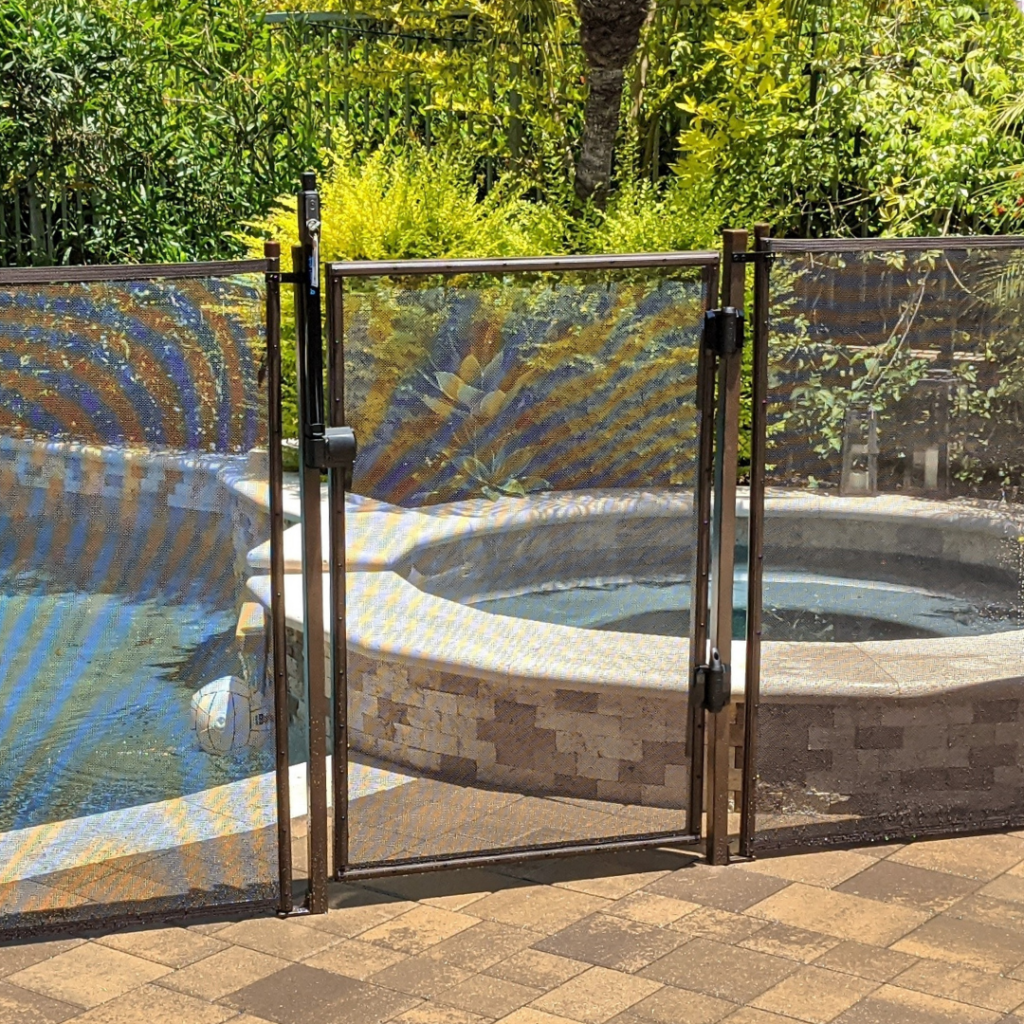
Color & Style Options
The pre-packaged Rectangular Post Gate Kit is available in both 4-foot and 5-foot heights and comes in a Classic Black Peg finish. If you prefer a different color or want to customize your gate, you can create your own kit by selecting a gate frame of your choice and pairing it with any gate post in the Rectangular Post Peg style.
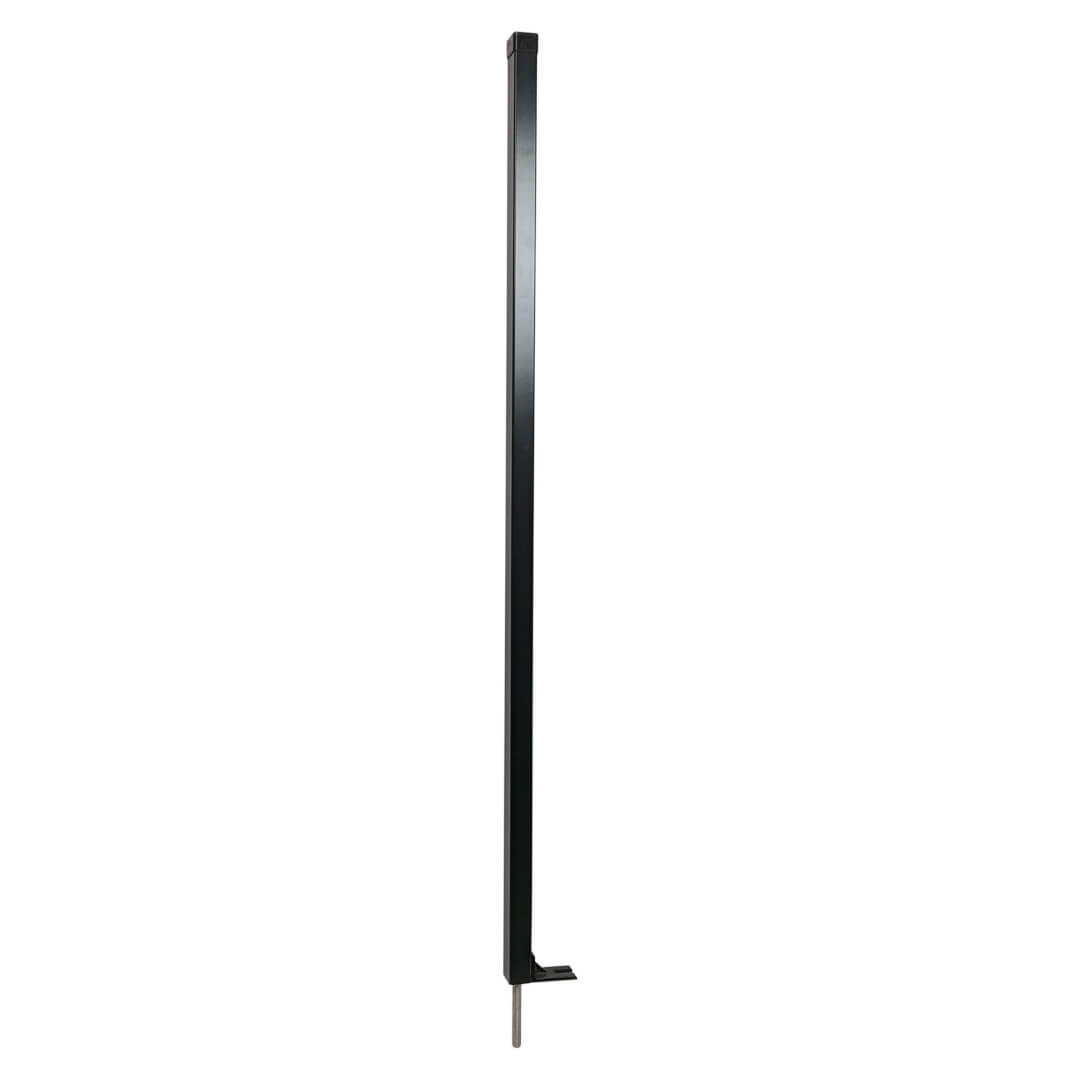
Here’s a closer look at a rectangular peg post:
Installation
You can follow our PDF Instructions, watch our detailed YouTube video or follow the steps below:
Video Instructions
Step by Step Instructions
1. Installing the Flange
- Start by using the two 1/2-inch screws and the flange.
- Align the holes in the flange with the pre-drilled holes in the rectangular post.
- Use a bit extender on your cordless drill with a #2 Phillips drive to secure the flange to the post.
2. Installing Posts and Fence
- Position the rectangular posts and fence in the deck.
- Ensure all sections of the fence are connected and securely attached at any termination points.
3. Attaching Rectangular Brackets
- Remove the top screw from each fence post and replace it with an eye screw.
- Align the rectangular bracket with the side of the rectangular post, marking the post at the middle hole of the bracket.
- Use long zip ties to temporarily hold the post and fence together, ensuring the eye screw and center mark are 2 ½ inches apart.
- Slide the eye screw through the middle slot of the bracket, aligning the top border with the fence.
- Drill the marked hole with a 5/32-inch drill bit and secure it using a 1-inch black screw.
- Attach the quick link to the eye screw and turn the eye horizontal to secure it.
4. Installing the Hinges
- Identify the weep holes on the gate frame to locate the bottom of the gate.
- From the top of the gate, measure and mark at 7 inches and 8 1/2 inches; from the bottom, mark at 10 1/2 inches and 12 inches.
- Use a 5/32-inch drill bit to pre-drill these marks, offsetting from the center line near the mesh.
- Remove any interfering screws from the gate frame.
- Insert screws through the hinge’s elongated holes and attach the hinges to the gate frame.
- Push the hinge against the post, aligning the top of the gate frame with the top border of the fence.
- Pre-drill only the top hole with a 5/32-inch bit and secure it, then proceed with the remaining screws.
5. Installing the Trilatch Gate Latch System
- Begin with the latch body mounting brackets. Mount the first bracket just below the rectangular bracket, pre-drilling and securing it in place.
- Slide the latch body onto the bracket, ensuring the pull knob housing is at 54 inches as per ASTM requirements.
- Install the bottom bracket into the latch body, pre-drilling and securing it.
- Slide the latch body off the mounting brackets, pre-drill the remaining holes, and secure them, leaving the bottom hole empty for now.
- Slide the latch body back onto the post.
- Mount the striker body mounting bracket onto the gate frame, aligning the indicator marks on the bracket and latch body.
- Pre-drill and secure the bracket, then attach the striker body.
- Adjust the silver adjustment screw until the striker body is properly installed, ensuring an equal gap on both sides of the latch body.
- Finally, secure the latch body with the long set screw and cover it with the set screw cap.
Final Steps
- Ensure the gate operates smoothly, latching securely without any obstructions.
- Regularly check and adjust the gate to maintain proper alignment and security.
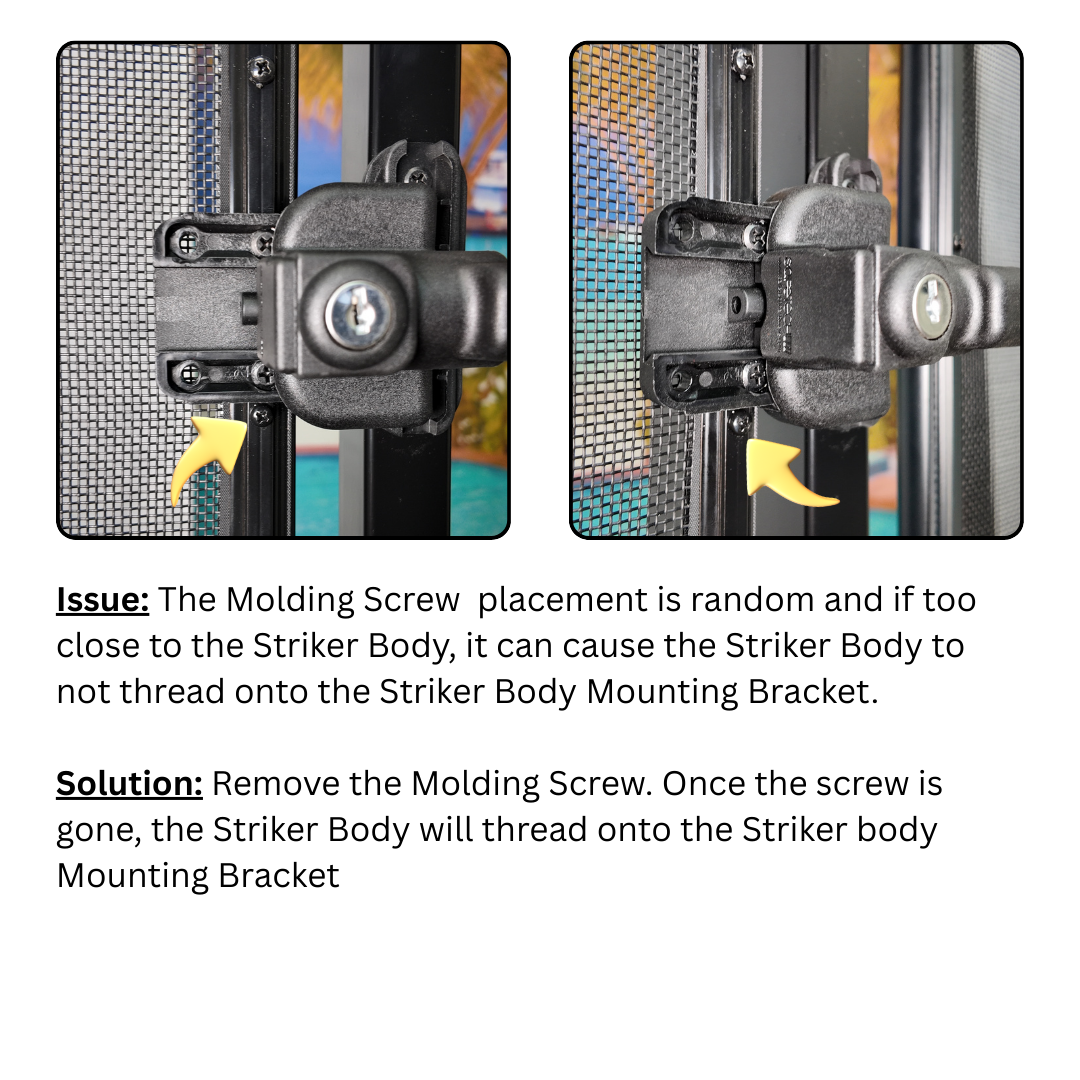
If Molding Screw is in the way of the TriLatch Striker Body:
Looking for Pool Fence Drilling & Installing details?
Check out our article – Hammer Drill Guide : Installing Peg Pole Pool Fencing
Does your TriLatch need adjusting?
Check out our YouTube video on TriLatch Gate Latch Adjusting