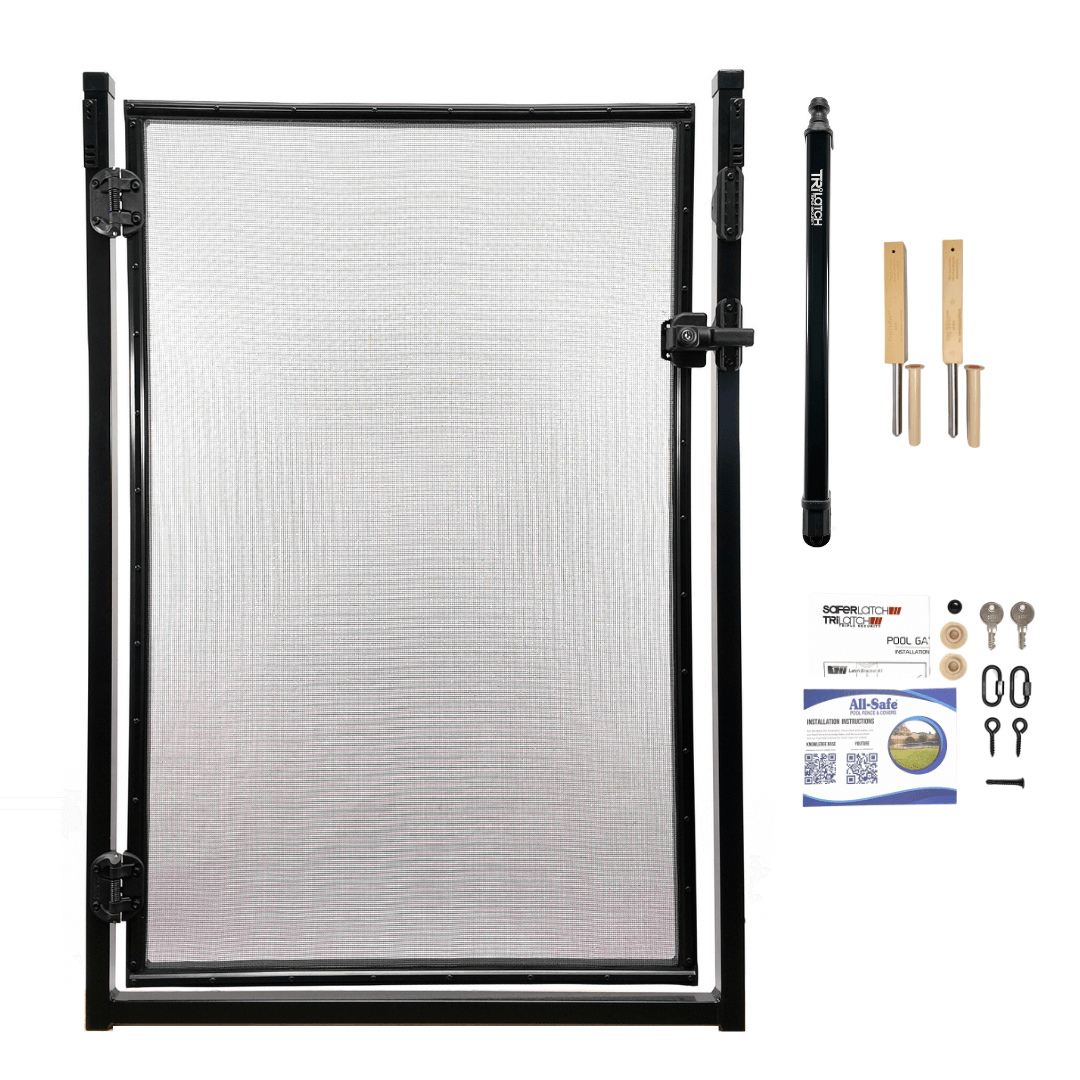
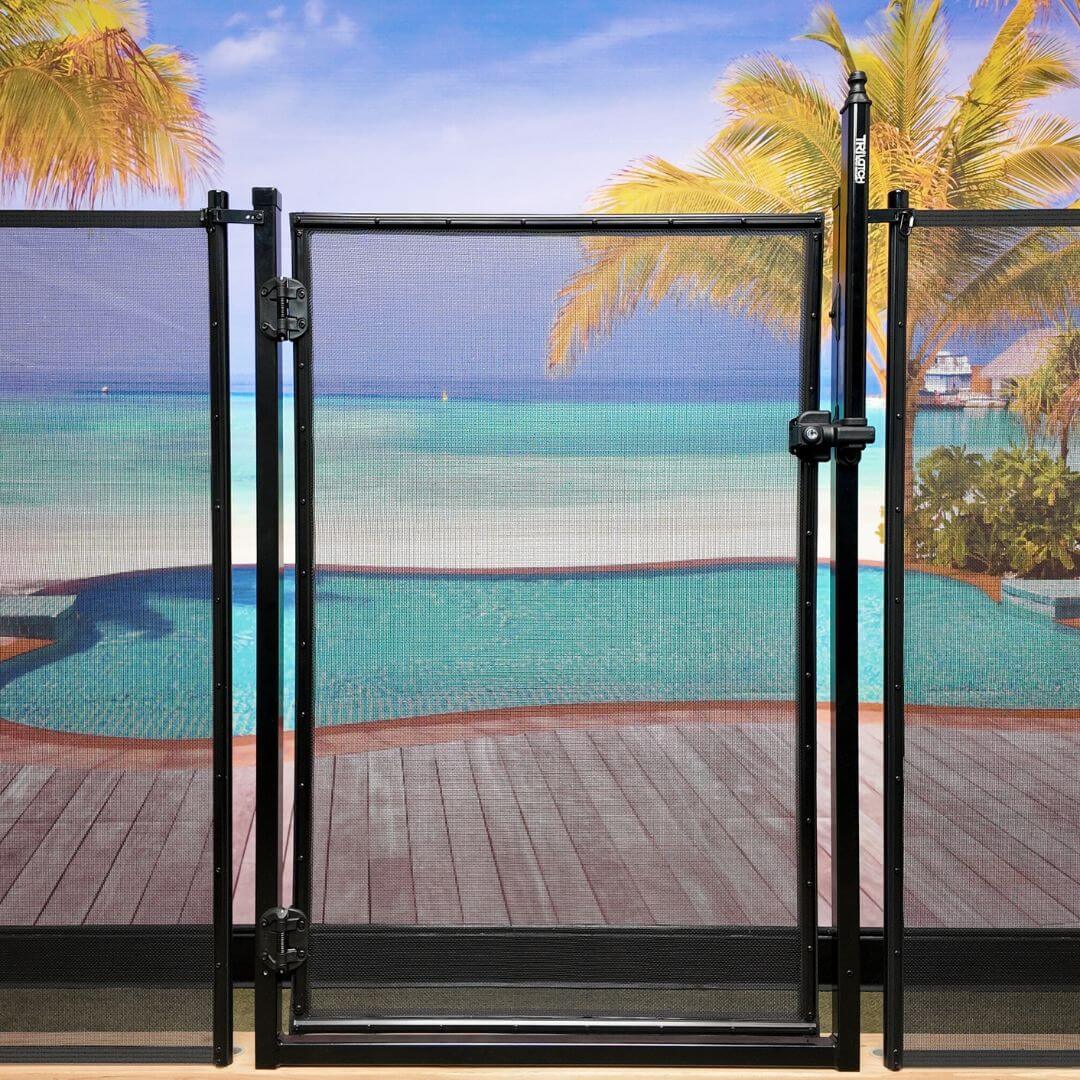
U-Safe Pool Fence Gate Kit
Introduction
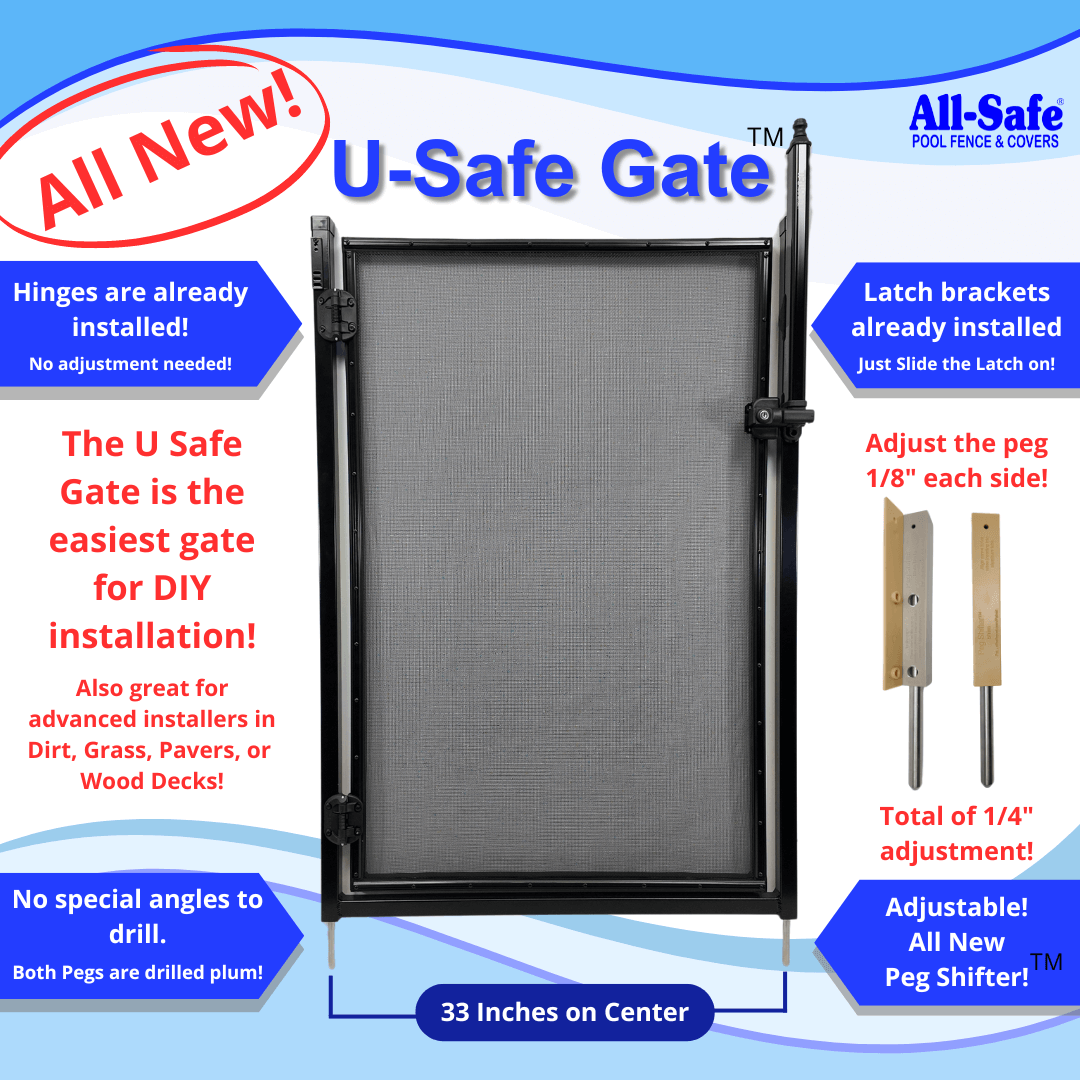
The U-Safe Gate is All Safe’s latest innovation in the pool safety industry. Designed primarily for the DIY market, the U-Safe Gate is by far the easiest gate to install. Right from the box, the U-Safe Gate comes with hinges and latch already installed, radically simplifying the overall installation process.
The U-Safe Gate has a U shape exoframe which is far less susceptible to varying fence tension keeping the gate isolated allowing proper latch adjustment.
Even though the U-Safe Gate has been designed for the DIY market, It also has uses for the more advanced installer. Wood Deck, Artificial Turf, and Dirt areas that would normally take extensive time and materials to prepare, can now be installed with minimal effort.
The U-Safe is only available exclusively in Peg and is designed to be used with our Classic Peg Style Fence and Components. This brings us to the next All Safe advancement in the pool safety industry. The Peg Shifter. The Pegs in the U-Safe Gate are adjustable up to a total of ¼ inch.
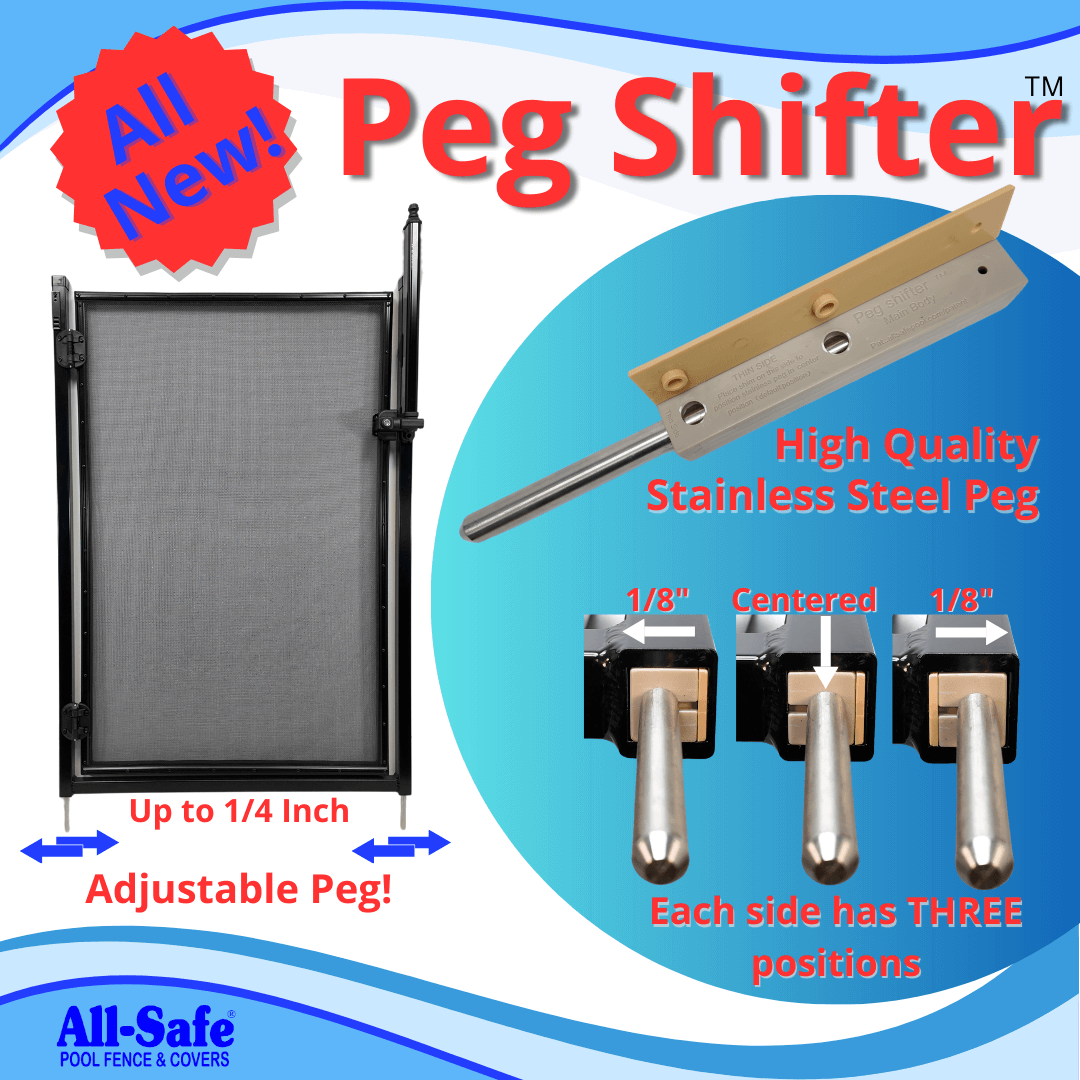
Another feature in the simplicity of the U Safe Gate is that it does not require special angles to be drilled for the gate to be installed. Two ⅝” holes drilled at 33” plum is all it takes. Even the most advanced installer can have the drill bit “walk” a bit. Not a worry, Each Peg is removable and adjustable up to ⅛” to the right or left giving you the ability to correct a slightly miss drilled hole combined up to ¼”.
Parts Needed
The U-Safe Gate System comes complete from the box. There are no other parts needed.
Yes, it’s that easy! Click here to buy your kit today
Color and Style Options
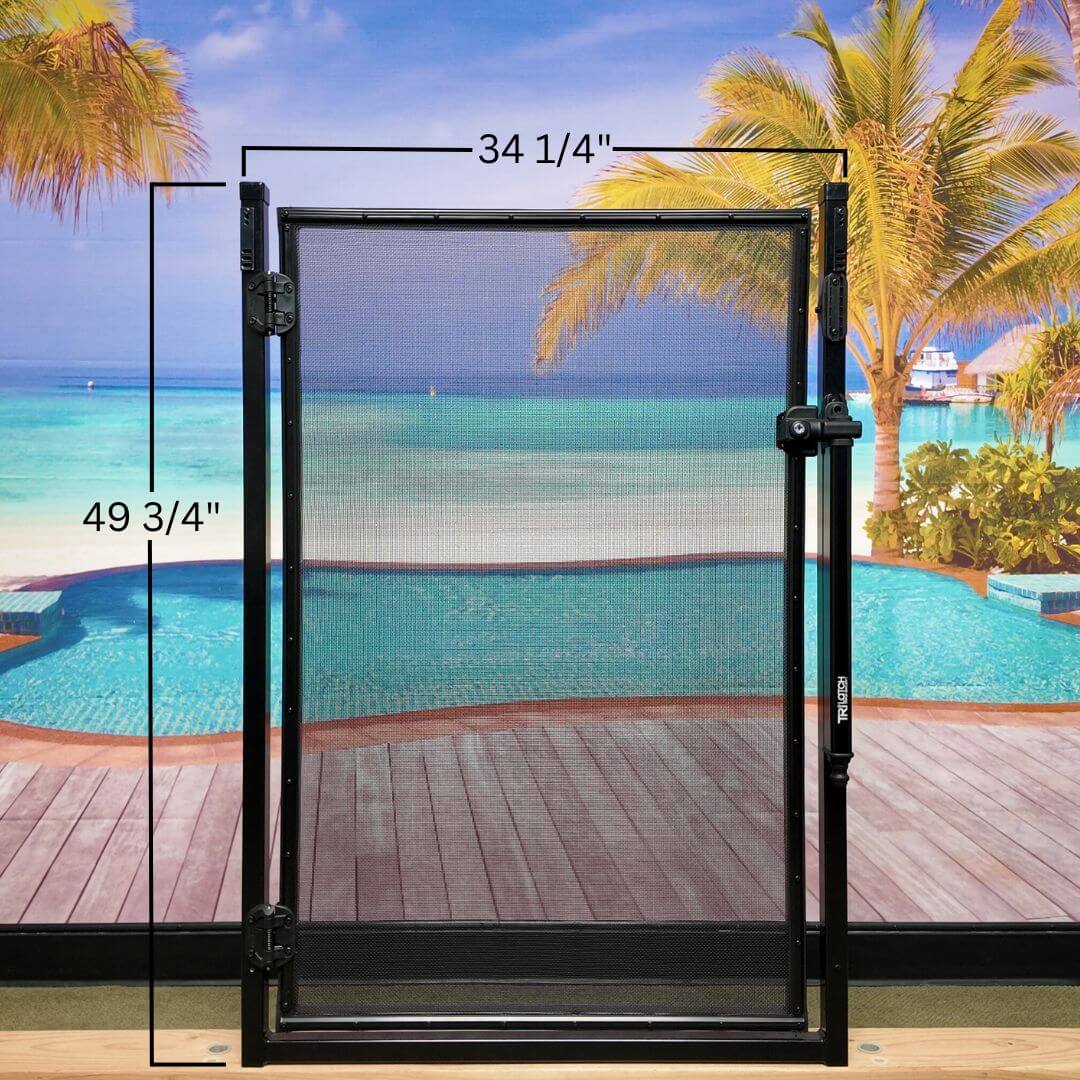
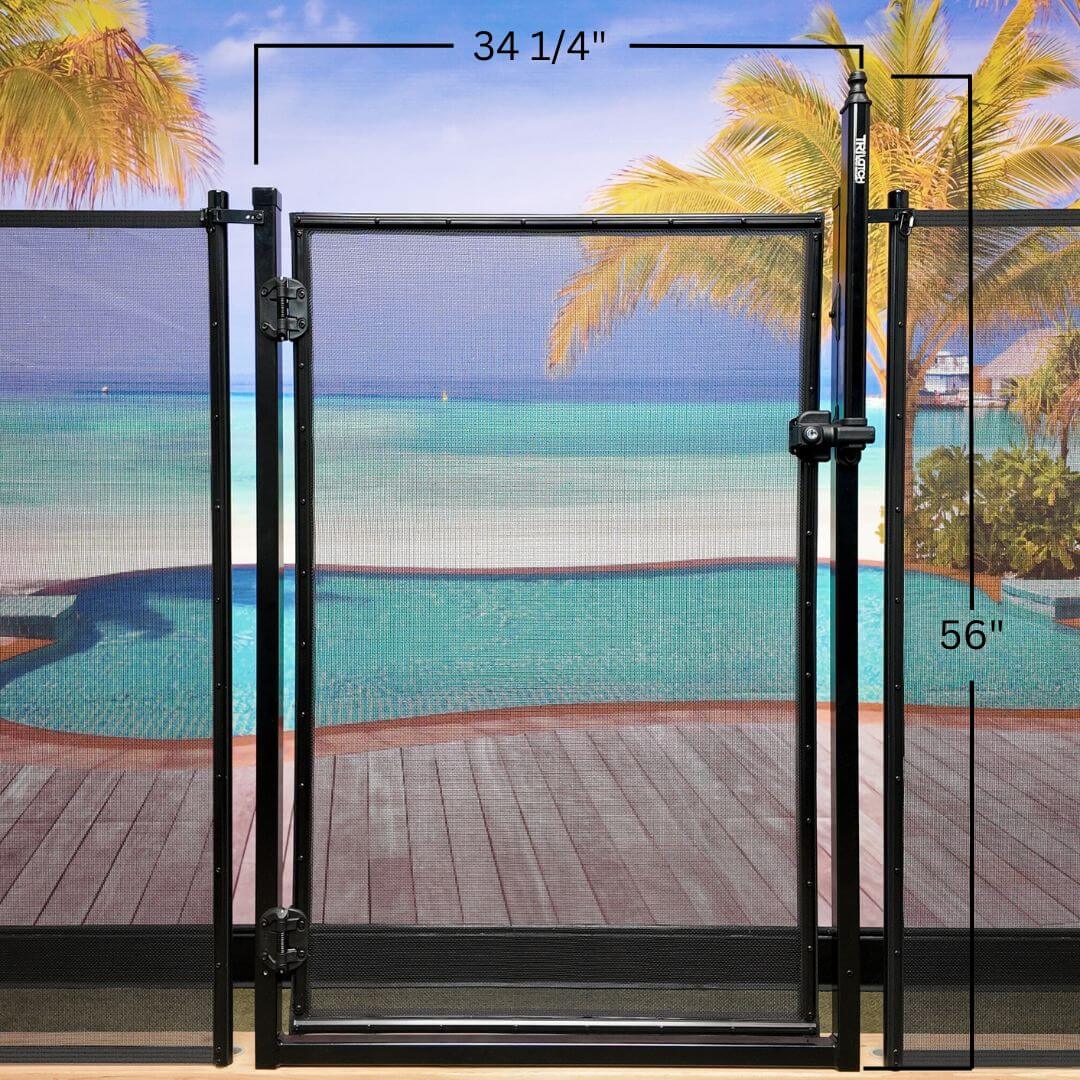
The U-Safe Gate is only available in 4 foot Peg, and has been powder coated Black to match the Classic paint finish
Installation
You can follow our PDF Instructions, watch our detailed YouTube video or follow the steps below:
Video Instructions
Unboxing and Installing the U-Safe Gate
Unboxing & Installation Step by Step Instructions
Positioning the Box:
Place the box near the pre-drilled holes for the gate.
Unpacking the Components:
Notice that the hinges and latch are pre-installed on the gate, making the setup simpler.
Preparing the Peg Shifter Inserts:
Set the Peg Shifter inserts aside and pull the plastic up about a foot.
Inserting Peg Shifters:
Slide the Peg Shifter inserts into each side of the U-Safe frame bottom, aligning the holes in the Peg Shifter with those in the U-Safe Gate frame. Do not secure them yet.
Aligning the Pegs:
Align one side of the gate, positioning the Stainless Peg directly over the sleeve. Check if the other side lines up as well. Misalignment can cause the gate to bind and not slide into the sleeves correctly.
Adjusting with Peg Shifter:
If the holes don’t align perfectly, use the Peg Shifter insert. Remove the shim, rotate the Peg Shifter 180 degrees to the notched side, reattach the shim, and reinsert the Peg Shifter, adjusting the peg’s position as needed.
Securing the Peg Shifter:
Align the hole in the gate frame with the hole in the Peg Shifter. Use the black fastener and two black washers to secure it. Adjust the other side if needed, allowing for an overall adjustment of up to ¼ inch.
Installing the Gate:
Slide the gate down into the sleeves.
Removing Packaging and Adjusting the Latch:
Remove the plastic bag from the U-Safe gate. The latch is attached upside down for shipping. Cut off the parts bag and detach the TriLatch by pressing the red button, pulling on the knob, and sliding it off its mount.
Securing the Latch:
Using a drill with a #2 Phillips bit, unscrew the bottom screw in the bottom mounting bracket attached to the frame. Slide the TriLatch back on the gate from the top and secure it with the extra-long black screw from the parts bag. Insert the little black plug into the hole to cover the screw.
Final Adjustments:
Make any final adjustments to ensure the gate operates smoothly.
For a more detailed explanation of the installation process, please view our YouTube video.
How to Add a U-Safe Pool Gate to Your Existing Pool Fence
Step-by-Step Guide: How to Add a U-Safe Gate to an Existing Pool Fence
Adding an access gate to your existing pool fence is simple with the U-Safe Gate. Follow these steps for a smooth installation process.
1. Prepare the Fence:
- Disconnect the fence section where the gate will be installed and set it aside.
- Snap a chalk line between the existing holes to guide placement.
2. Measure and Mark Drill Points:
- Measure and mark a new drill hole 33 inches on center from the section break hole.
- Ensure correct spacing:
- Right side: Two existing section break holes, 2 ½ inches apart.
- Left side: 3-inch spacing (adjustable with the Rectangular Bracket).
3. Drill the New Hole:
- Drill the marked hole plumb (straight down).
- Tap the deck sleeve into the drilled hole.
4. Install the Peg Shifter:
- Open the U-Safe Gate box and adjust the Peg Shifter.
- Use the Peg Shifter to fine-tune the peg’s position if the drill bit shifted during drilling.
- Secure the Peg Shifter in place.
5. Install the Gate:
- Stand the gate upright and slide it into the holes.
- Attach the fence to the right side of the gate.
- Complete the fence cut on the left side.
6. Attach and Adjust the Latch:
- Slide the latch onto the gate.
- Ensure it’s properly adjusted for a secure fit.
7. Final Checks:
- Confirm proper alignment and secure all components.
- Test the gate to ensure smooth operation.
By following these steps, you can successfully add a U-Safe Gate to your existing pool fence with minimal effort and just one drilled hole!
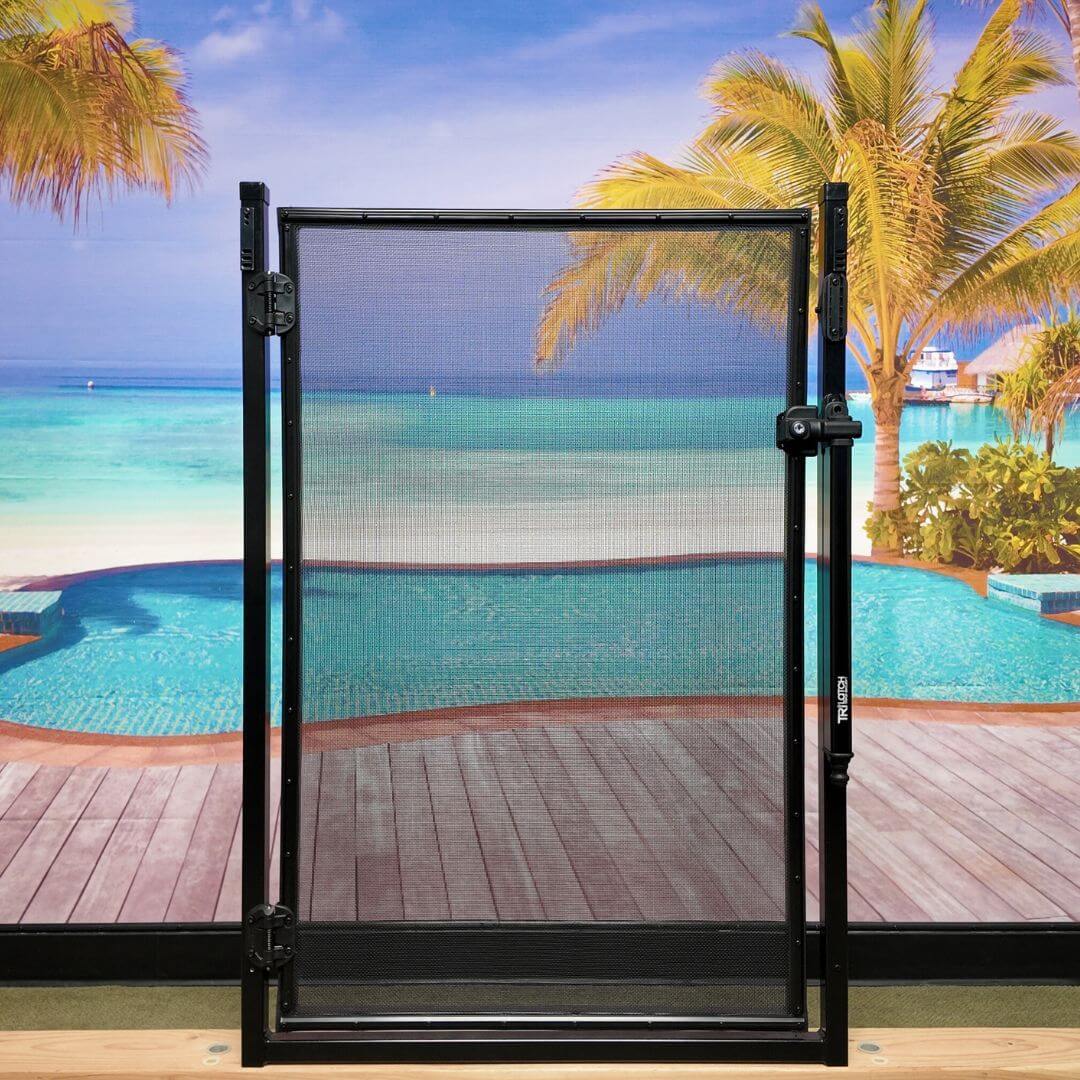
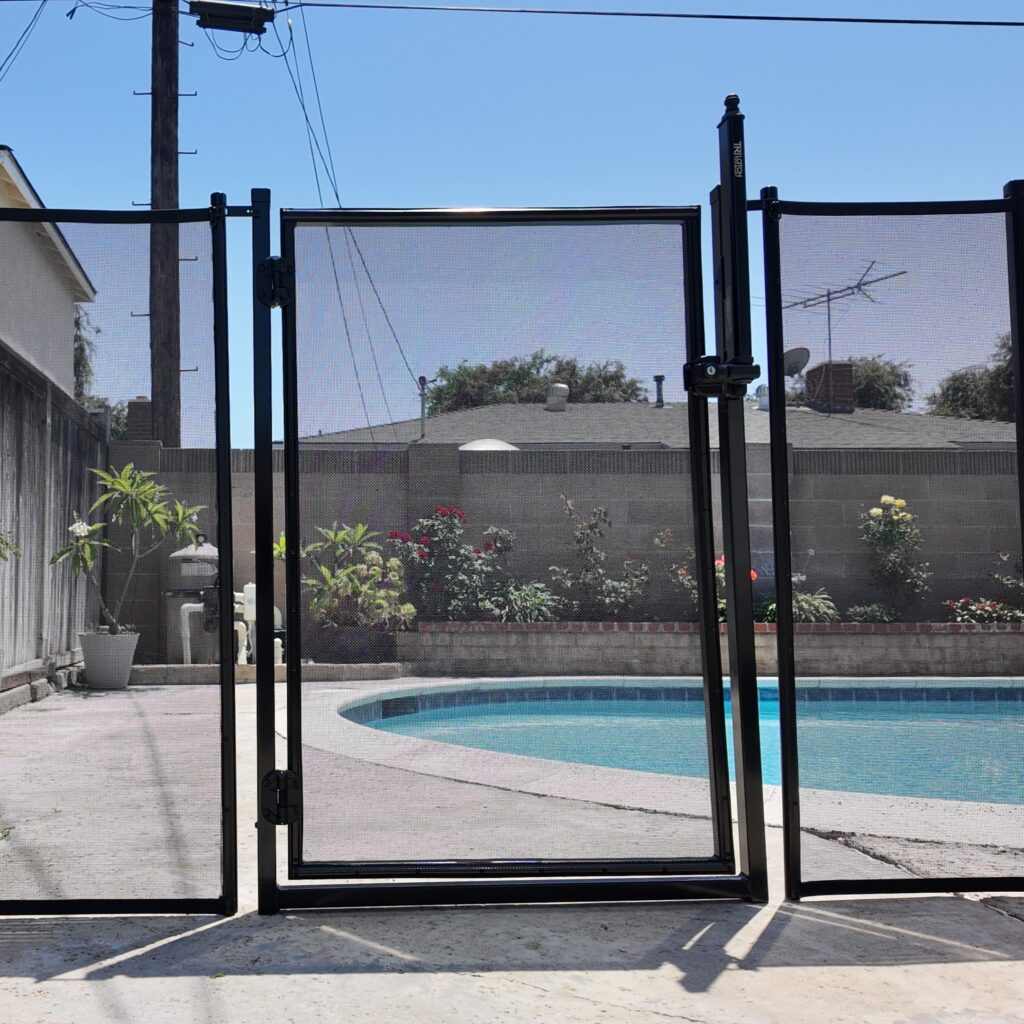
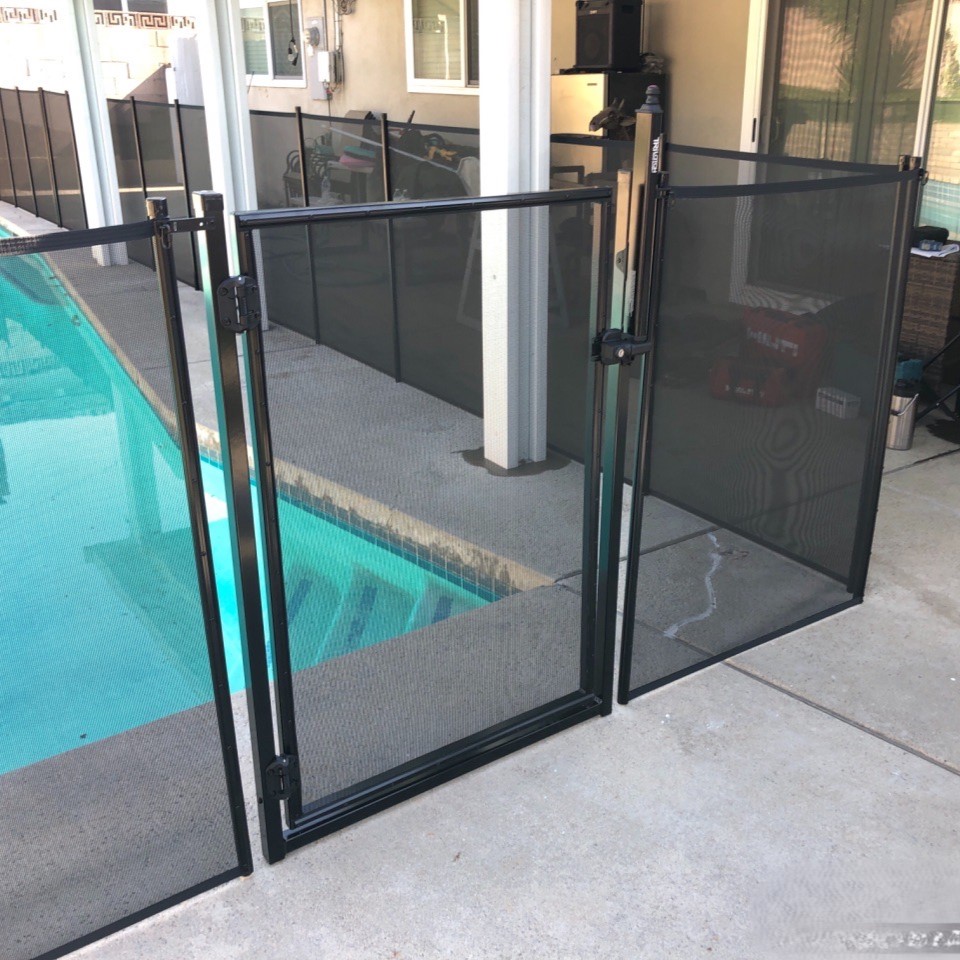
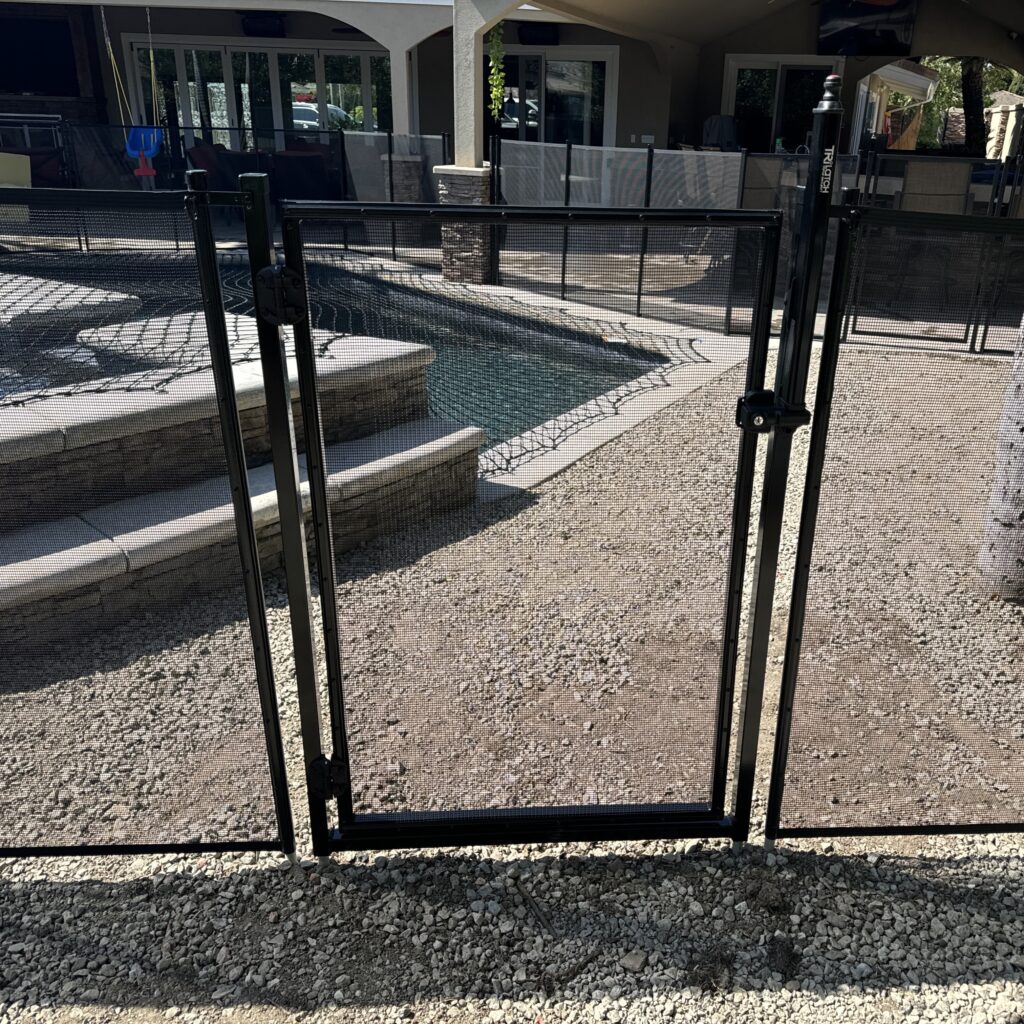
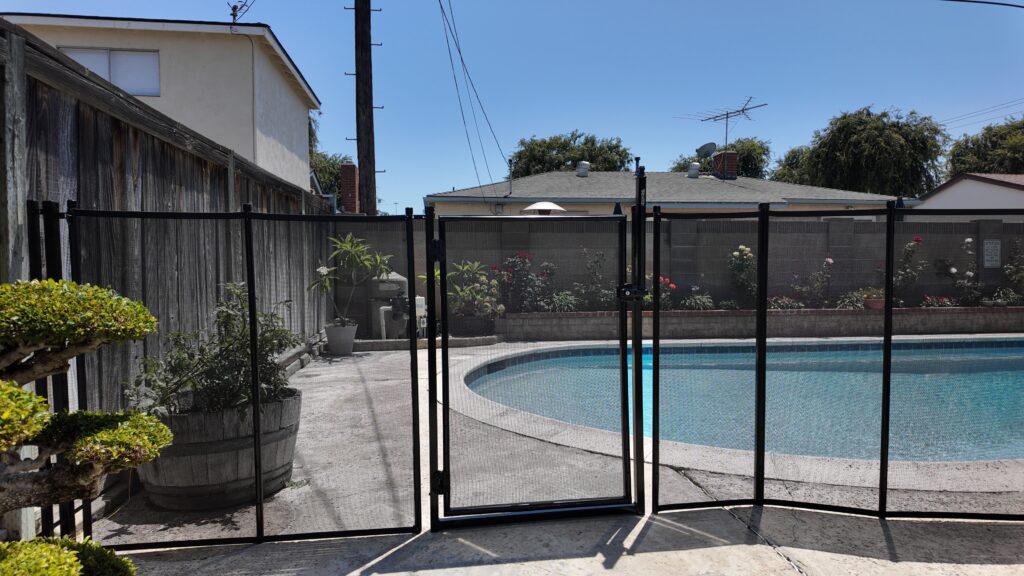
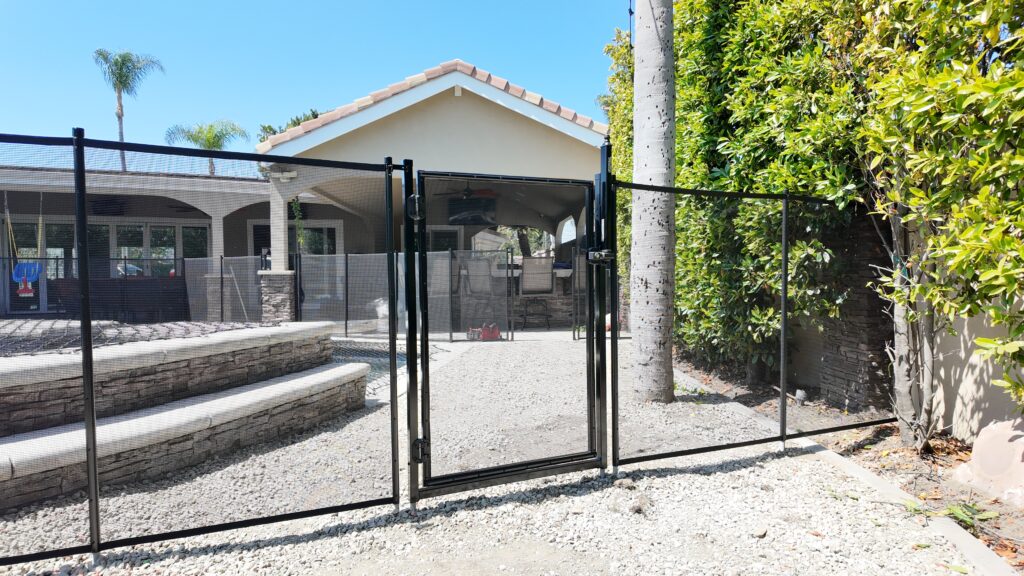
Installed Gate Kit Photos
Looking for Pool Fence Drilling & Installing details?
Check out our article – Hammer Drill Guide : Installing Peg Pole Pool Fencing