Learning to swim is an important life skill that any child can enjoy. Swimming enables them to get some exercise, have some fun, and feel proud of their new accomplishment. Learning to swim can also be a life-saving skill, and the earlier a child masters it, the better.
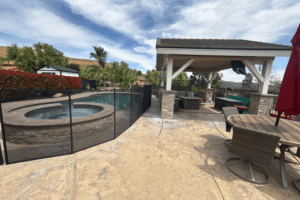
If you have a swimming pool at your house, it is even more essential that your little one learns how to swim. After all, accidents can happen; if your child should fall into the pool (or go swimming unsupervised) they will be better served if they can swim. Even so, swimming ability should never be taken as a complete replacement for a proper safety barrier like a pool fence or pool net.
But just how do you teach a child to swim? We have a few helpful hints that will turn your little one into a strong swimmer in no time.
Start Small, Learn to Float
If you want to teach a child to swim, you have to start with the basics. For example, most teachers start by having children try to float on their backs. This skill may seem easy (even deceptively so), but it is actually an important foundation for learning to swim.
For many children, fear of the water causes them to hold their breath, which can be very dangerous if they aren’t being watched. Floating allows a child to get comfortable in the water and teaches them to keep breathing. Mastering this skill makes it much easier to learn other swimming techniques.
If your child is not comfortable with floating their first time in the pool, don’t push it! Learning to swim, like learning most things, takes time, and everyone learns at their own pace. Encourage your kid to do whatever he or she feels comfortable with, whether that means floating solo on their back or simply dipping a toe in the water.
Keep Lessons Short
When you teach a child to swim, watching them succeed and master a new technique can be lots of fun! Struggle, on the other hand, can be very discouraging. Some parents will insist on staying in the water until their kid “gets it right,” but this is actually counterproductive.
Remember, swimming is an aerobic activity — and one that your child isn’t quite used to. Forcing them to keep swimming when they’re too tired (or just not having fun anymore) won’t help them learn. In fact, it may even create bad habits or even put them off swimming entirely!
We suggest keeping your swim lessons to 30 minutes or less. If your child asks to stay in the water and practice more, that’s ok, but make sure it’s his or her idea, not yours. This will help your child develop a love for swimming, instead of considering it a chore.
Start With Floaties
This particular item on our list is somewhat controversial. Some folks say that water wings or other flotation devices are not useful tools — they don’t teach the child to swim, they say, but instead they teach the child to rely on the floaties.
Flotation devices can be a useful tool during swimming lessons. They allow the child to safely venture away from the shallow end (which allows them to practice their strokes and kicks even more) and helps them overcome any fear of being in the deep end. However, this doesn’t mean that they should be used all the time.
If your child is struggling to let go of the wall or venture into the deep end, floaties can be a great way to help them overcome this fear. Then, once they feel more comfortable, you can remove them and have them go without! Just make sure to have them swim without the floaties in the shallow end first, so they know what they’re getting into!
Emphasize Kicking
Kicking is an essential part of staying afloat in the water. Leg muscles are some of the strongest and highest-endurance muscles in the body. A swimmer staying afloat with just their arms will quickly tire and sink. This is why, if you’re going to teach a child to swim, you need to really teach them to kick.
Start by having your child grasp onto the pool ladder or wall and kick their feet as much as possible. Tell them to make sure their feet break the water’s surface, causing splashes behind them. Then, once they seem ready, have them practice kicking across the shallow end of the pool.
If your child is having trouble staying flat on the water while they kick, have them hold onto a kickboard. This will help them understand the appropriate body position for swimming, which just might save their lives in an emergency.
Don’t Encourage Swimming Alone
After you teach your child to swim, he or she may want to spend more time in the water than they did before. However, it is absolutely critical that you teach them this important rule: never go swimming alone!
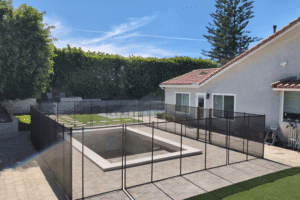
Regardless of how old you are, or how good a swimmer you are, it’s never wise to enter the pool without supervision. Even the strongest swimmers in the world, like those who race at the Olympics, have a lifeguard on duty in the event of an emergency! Teaching your kid this simple rule will help them understand the importance of being safe. This also helps to reinforce the necessity of important safety barriers such as mesh pool fences and covers.
Getting Started
If you use these guidelines, you should be able to teach your child to swim in a way that is simple and fun for both of you. Before you know it, your little one will be hopping into the water and swimming laps like a pro!
When your backyard is used for playtime, parties, and pets, pool safety gets more complicated. Learn how to create a safer multi-use backyard with the right pool fence layout, smart traffic flow, and layered safety features.
Building a new pool or planning a major backyard remodel is the best time to think through pool fence placement. Learn how to plan your fence early so your design stays safe, code-conscious, and easy to use for your family.
Listing your home or guest house with a pool can boost bookings, but it also raises your responsibility. Learn how short‑term rental hosts can use pool fences, clear rules, and simple routines to keep guests safer and reduce risk.