Nothing says summertime quite like an open pool. Keeping in mind the best time to open your pool in your area, here is your essential checklist for how to open an inground pool.
Clean Around the Cover & Remove Debris
Your first step in how to open your pool for summer is to remove any debris that may have collected on top of or trapped underneath your pool cover. Leaves, sticks, dirt, and more can build up on top of or around your cover. If you don’t sweep it off before storing the cover for summer, the debris can fall into the water and be more troublesome to clean or potentially affect your pool’s chemical balance. Gently collect the leaves and debris and pile them away from the pool area.
Remove the Cover
Every brand of pool cover is slightly different to remove, but share the same basic premise — unless you have an automatic cover. Start by unattaching the anchors keeping your cover in place. Next, find a helper with a free pair of hands. Each of you take a hold of the cover at one end, then walk it over and out across the length of the pool.
Once removed, clean and store your pool cover out of the sun. Cleaning your cover before storage is an essential step, so don’t skip it!
If you use a pool net as your cover, you may need the extra step of skimming large debris and leaves out of your pool once you store the net. Pool nets, while highly effective safety tools when used correctly, do not typically keep leaves and other matter from falling into the water.
The next step when digging into how to open an inground pool is preparing your filtration system.
Check Your Filters
Even if you had a tightly fitting pool cover and there wasn’t much large debris, chances are there are tiny bits of sediment that found their way into your pool’s water throughout winter, clouding it. While your filtration system was idle during the colder months, it now has its work cut out for it to prep for summer.
Take this opportunity to check and clean your filter, O-rings, and pipes. Ensure there are no cracked or dry O-rings and replace those if necessary. Clean the filter thoroughly and make sure drain plugs are secure.
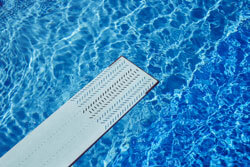
Replace Equipment
The next step in how to open an inground pool is to replace deck equipment like pool ladders, step rails, or diving boards. Check for rust or worn nuts and bolts, then re-install your equipment.
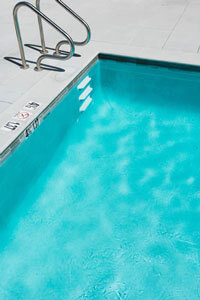
Just Add Water
When you prepare a pool for winter, you’ll often want to drain the pool to below the filter line so that water does not freeze inside any pipes. You may have also lost a few inches of water from evaporation. Take this opportunity to fill your pool to capacity before you fire up your filtration system.
Start Your System and Scrub
Once your water levels are solid and your filtration system is ready to go, start the system. To open an inground pool, cleanliness is key! So with the filtration running, grab your pool brush and give the sides and bottom of your pool a thorough scrubbing.
Brushing dirt that’s stuck to the walls and floor of your pool while the freshly cleaned filtration system is on means that dirt gets filtered out right away. Nothing looks more inviting than a pool with clean, freshly scrubbed walls.
Check Your Chemicals
When your filtration system is humming smoothly and your pool is sparkling clean, your next essential step in how to open your pool for summer is to check your chemical levels. During winter, pool chemicals become depleted, so it’s vital to ensure they’re at proper levels before using your pool.
Be extra safe when engaging in this opening inground pool how-to. Wear gloves and use only professionally vetted pool water test kits. Make sure the balance of your chemicals follows these guidelines:
Chlorine: 1–3 ppm
Alkalinity: 80–120 ppm
Calcium: 150–250 ppm
PH level: 7.2–7.4
Let It Run
Let your pool’s filtration system run for a full 24 hours before opening your pool for swimmers. This time frame allows you to be sure your chemicals remain in balance, that there are no issues with the filtration system, and that you’ve gotten all large debris out of the water that could otherwise potentially clog your pipes.
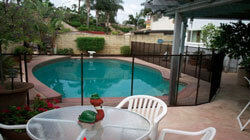
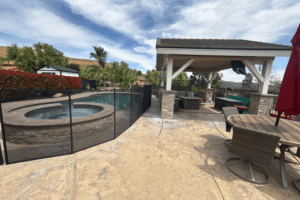
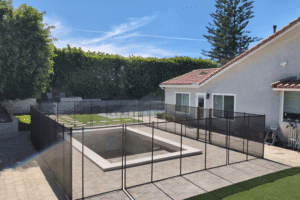
Stay Safe with a Pool Safety Barrier
The final step in how to open your inground pool is our highest priority: keeping your pool area safe.
Whether you replace your pool net, put up/double-check your pool fence, or replace the batteries in your pool alarm (we recommend all three!), the safety of your newly opened pool is paramount.
Implementing a pool safety barrier to protect those most at-risk — like children, pets, and the elderly — can mean the difference between life and death when seconds count. All-Safe has specialized in this life-saving area for more than 20 years, so trust us when we say your family’s safety is in the front of our minds.
Contact All-Safe with Your Opening Inground Pool How-To Questions
From pool nets to fences to alarms, All-Safe products are strong, easy to use, and dependable. Let our local dealer’s uniformed, professional team provide you with a free onsite consultation and exceed all your pool area needs. Contact us today to schedule your appointment.
When your backyard is used for playtime, parties, and pets, pool safety gets more complicated. Learn how to create a safer multi-use backyard with the right pool fence layout, smart traffic flow, and layered safety features.
Building a new pool or planning a major backyard remodel is the best time to think through pool fence placement. Learn how to plan your fence early so your design stays safe, code-conscious, and easy to use for your family.
Listing your home or guest house with a pool can boost bookings, but it also raises your responsibility. Learn how short‑term rental hosts can use pool fences, clear rules, and simple routines to keep guests safer and reduce risk.