DIY Pool Fence
What Happens When DIY Pool Fence Installers Skip the Instructions?
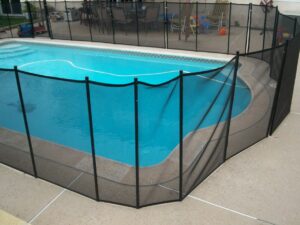
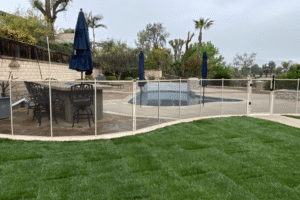
Skipping DIY pool fence instructions can lead to misaligned sections, bad spacing, and gate issues. Learn common mistakes and how to avoid them.


Part of keeping your swimming pool safe year-round is understanding the right way to close your pool for the winter. Beyond the ability of proper pool winterization to protect your swimming pool from damage during the cold months, it also helps you ensure it’s easier to reopen your swimming pool safely in the spring as temperatures rise. There’s a lot more to being ready for freezing temperatures than just knowing what chemicals you put in the pool for winter, but don’t worry. As your trusted pool safety and information experts, we’re ready to help take the guesswork out of the change of seasons so you can close your pool for the winter with confidence.
When temperatures dip toward freezing, your pool is in danger. Ice expands as it freezes, threatening pipes, hoses, and vinyl pool liners. In addition, many plastic and polymer-based materials can become brittle in extreme cold. Beyond these straightforward damage risks, many pool owners find that keeping up with regular maintenance–an often wet and water-logged job during the best of times–can be unpleasant and even dangerous when freezing temperatures and wind are involved. This leads to lapses that make bacterial proliferation, algae bloom, and scaling all the more likely before consistent warm weather returns.
When you close your pool for the winter, you’re protecting it for the duration of the cold-weather months by lowering the risk of ice-related damage, biological contaminations that can take extensive work to eliminate once they’ve gained a foothold and scaling or discoloration that comes from still water sitting for long periods of time. Once temperatures are consistently dropping below 65℉, it’s time to start planning to winterize your pool. You want to make sure your pool is ready before the first freezes hit, but after they begin staying down low enough that the chemicals you put in the pool for winter are sufficient to control algae both immediately and until the weather warms up enough for normal maintenance to resume.
Before you begin to winterize your pool, take the time to make sure you’re ready to complete the process. That includes making sure you have the chemicals and cleaning supplies you need as well as the time required to do the job right.
Now that the prep work is done, it’s time to start the closing process in earnest. Right now, aside from the missing fixtures, your pool is still as ready to accept summer swimmers as it was when the season started, so it’s time to get it ready for colder weather.
You’re almost done. The water and equipment are prepared, so all that’s left is to securely close the pool for the winter. When you winterize your pool, it’s not just about protecting the pool itself but also about keeping your pool area safe for your loved ones year-round.
Your local All-Safe Pool installers are the local pool safety experts you can rely on to help you create a pool that helps protect your friends, family, and pets. They’ll take measurements, talk to you about your pool’s needs, and explain your safety barrier options. Finally, they’ll give you a written estimate that shows you just how cost-effective safety can be. Schedule your free quote with your All-Safe Pool installer today.
Skipping DIY pool fence instructions can lead to misaligned sections, bad spacing, and gate issues. Learn common mistakes and how to avoid them.
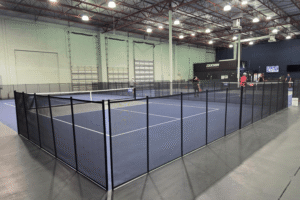
Mesh removable pool fencing is a flexible, affordable way to add boundaries to pickleball courts. It keeps balls contained, looks clean, and can be removed when needed.
Just installed a removable pool fence? Here’s what’s normal in the first weeks, what to watch for with gate performance, and how to keep the mesh clean and secure through seasonal changes.