DIY Pool Fence Installation on Uneven Terrain: Tips and Tricks

Building a fence on uneven ground can be challenging, but a removable mesh pool fence remains one of the best ways to prevent unsupervised access to your swimming pool area. While you most often think of the area around a swimming pool being flat, many backyards feature bumps or slopes that can create an uneven surface. With a little care, planning, and work, you can still build a secure DIY pool safety fence to keep your pool area safer. 

Knowing Your Pool Fence Code

Before you order supplies for your pool fence or start trying to take measurements for building a fence on uneven ground, you need to know the parameters your pool fence needs to meet under law. In most cases, the city or state will have guidelines that stipulate the minimum height for a pool safety fence, allowable gap sizes, and approved construction techniques. They may also detail what alternative swimming pool safety barriers are allowed instead of swimming pool safety fences.

Understanding Uneven Ground

new construction pool build in a backyard with uneven terrain

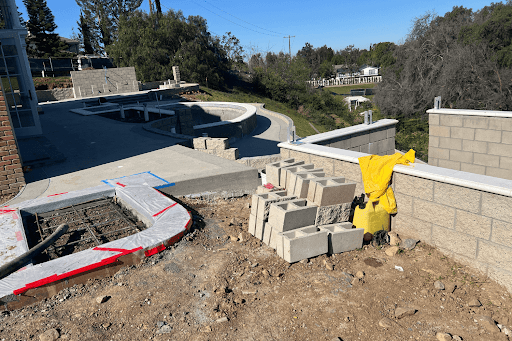
Ground doesn’t start out even. That’s why, when a home is built, professional excavation contractors prepare the land for the new home’s foundation. They’ll bring in heavy machinery that fills low spots, flattens high points, and compacts the whole area to create a more stable and uniform plot to build in. Sometimes the contractor may only prepare the area under the future building. Other times, as the years pass, weather cycles, landscaping events, and more can return the undeveloped portion of your land to its natural state. If it gets bumpy enough, you may need to build your pool fence on uneven ground or explore other options.

There are several features of uneven ground you need to account for:

  • Bumps – Small raised areas that sit higher than the surrounding surfaces.
  • Dips – Small sunken areas that drop lower than the surfaces surrounding them.
  • Slope Angle – If the land steadily rises in one direction and falls away in the other, this is the slope, and the angle represents how fast or slow the elevation changes.
  • Slope Direction – This is the direction the slope lies in relation to the fence you’re building on uneven ground.
  • Drainage Features – Some slopes and dips signify natural drainage features created over time to channel water over the land. Any modification to these needs to be thoughtfully considered to ensure you don’t create dammed-up areas where water will stand.

Measuring Your Land for a DIY Pool Fence

pool deck with chalk lines marking pool fence installation location

Unlike flat ground, measuring for your pool fence on uneven ground takes more than just a rope or hose to lay out and measure. You’ll need to account not only for the linear distance, but in some cases, plan for the features of your uneven ground. Start by deciding the rough location of where you want your fence to be, remembering that straight lines are always easier to create with a DIY pool fence than curves. For long straight lines, you’ll want two wooden yard sign stakes (available at most hardware stores) and some twine, rope, or yarn. 

Hammer the stakes in at the terminal ends or your straight line area. If it’s a longer distance–15 feet or more– It can be helpful to pick up an extra stake or two to keep the middle from sagging. Tie the string off loosely at one end, and run it to the farthest pole, looping it once around intervening poles for support. Tie the string loosely, but don’t pull it taught yet. Adjust the string along its length to create the straightest line possible just above the ground, then secure the string tightly.

This not only gives you a linear measurement for your fence without bunching over bumps but also lets you evaluate the extent of the deviation caused by building a fence on uneven ground. Measure the largest gaps present so you understand what you’re dealing with. If your fence runs perpendicular to the slope, you’ll need to know how high the land rises or falls a foot away from your prospective fence line. If you’re running parallel with the slope, you need to understand if it’s continuous or stepped so you know whether to measure for a raked DIY pool fence installation or a stepped installation where each segment is its own smaller straight line.  

Tips and Tricks for Building a Fence on Uneven Ground

  1. Consider Whether it Would Be Better to Level the Ground. – In some cases, the best choice may be to hire an excavation contractor or landscaping professional to eliminate some of the unevenness. They can fill in large gaps, eliminate high points, and make sure the area around the fence is leveled to provide a consistent height. This can especially be an option if you’re installing a new pool and can have the fencing area prepared at the same time as the pool area.
  2. Eliminate Gaps Bigger than Four Inches. – Even if you don’t even the ground, you need to ensure no gaps large enough to pass a four-inch sphere through will exist. That means you should plan on leveling any areas from your staked measurement line that were four inches or more away from the line itself. Use either loose soil or gravel and tamp it down to minimize gaps. Then consider adding a layer of sod or planting fast-growing grass to help secure it in place and avoid washout.
  3. Make Sure Your Pool is Height-Compliant. – Your pool fence must be tall enough to meet regulatory specifications across its entire length. This may mean ordering taller pool fence parts if a slope or small hill will be close enough to create a climbing danger near your pool fence. Stepped installations could include installing a section of a taller fence right after a step down before returning to the normal fence height.
  4. Follow Directions When Pouring Support Concrete. – Since uneven ground is usually not paved, you’ll need to pour support concrete for your DIY pool fence posts. Good concrete makes building fences on uneven ground easier because you can ensure the proper tension of the mesh material to further reduce the risk that small gaps can be used to enter the swimming pool area.
  5. Consider a Second Layer of Protection. – It’s always a good idea to think about pool safety in terms of layers of protection. Installing a secondary safety barrier, like a swimming pool safety cover or pool safety net, behind a removable mesh swimming pool fence ensures that even if a vulnerable person or pet gets past your safety fence, they won’t have access to the surface of your swimming pool.

Order Your DIY Pool Fence Supplies Online

We offer the same high-quality pool safety fence parts that your local independent contractors use, directly to the public. Take measurements, order supplies, and build a fence that protects your loved ones. Build a strong pool safety fence on uneven ground with All-Safe Pool today.

Share on Social!

You might also enjoy:

Backyard swimming pool with black mesh pool fence surrounding it and solar sun rings floating in the water
Top Pool Fence Accessories That Make a Big Impact

The top pool fence accessories can help you get the most from your backyard oasis. Take a look at our top recommendations and learn how to pick the gear that’s right for your pool safety fence installation.

Blue mesh winter pool cover installed over a backyard swimming pool
Spring Cleaning: How to Clean and Store Your Pool Cover

Knowing how to clean a pool cover helps you extend its life and find any signs of damage before they put your loved ones at risk. Learn our best practices for cleaning and pool cover storage so your cover is ready to go next winter.

Connect with a Pool Safety Professional

Enter your zip code to locate an independent installer in your area

Find a Local Installer

Enter your zip code to locate an independent installer in your area

Get Started!

Enter in your zip code to let us know where your pool is located.

Color Variations

Colors on your screen or brochure may not match the actual color of your product.

Due to the many variations in monitors, phones, and browsers, color samples and product examples may appear different on different screens. Computers and mobile devices are not all calibrated equally and color reproduction on the Internet is not precise. The same is true for printed items such as brochures and other sales literature. 

In addition, the colors of our products photograph differently under different lighting conditions. For example, photos taken in full sunlight will vary from photos taken on a cloudy or overcast day. Similarly, shadows from nearby objects can affect the color and transparency of our products. If a precise color or specific shade is important, please inspect the actual color of your product prior to installation.

Colors will vary from batch to batch.

Many of our products’ materials are not available through typical stores and vendors and therefore must be custom manufactured specifically for our use. In order to control costs and provide you with the best value possible, our raw materials are produced in large batches and can often take several months to receive. The colors of our materials can, and often do, vary slightly from batch to batch. Although we make every effort to minimize color variations, we cannot be responsible for these differences when they occur. If a precise color or specific shade is important, please inspect the actual color of your product prior to installation.

Color names are subjective and may not be what you think the color should be.

For example, we use the name “putty” to describe some of our products. Your idea of the color “putty” may be different than someone else’s idea of “putty”. In addition, products may have the same color name but may not be the exact same color. For example, we have different shades of “black”. Please do not order using color names as your only guide. If a precise color or specific shade is important, please inspect the actual color of your product prior to installation.

Inspect the actual color of your product prior to installation.

If it is important that your product be an exact color or shade, it is highly recommended that you inspect the actual product prior to its installation and address any concerns with your local independent installer. Most independent installers do not offer refunds or accept returns due to color variations.