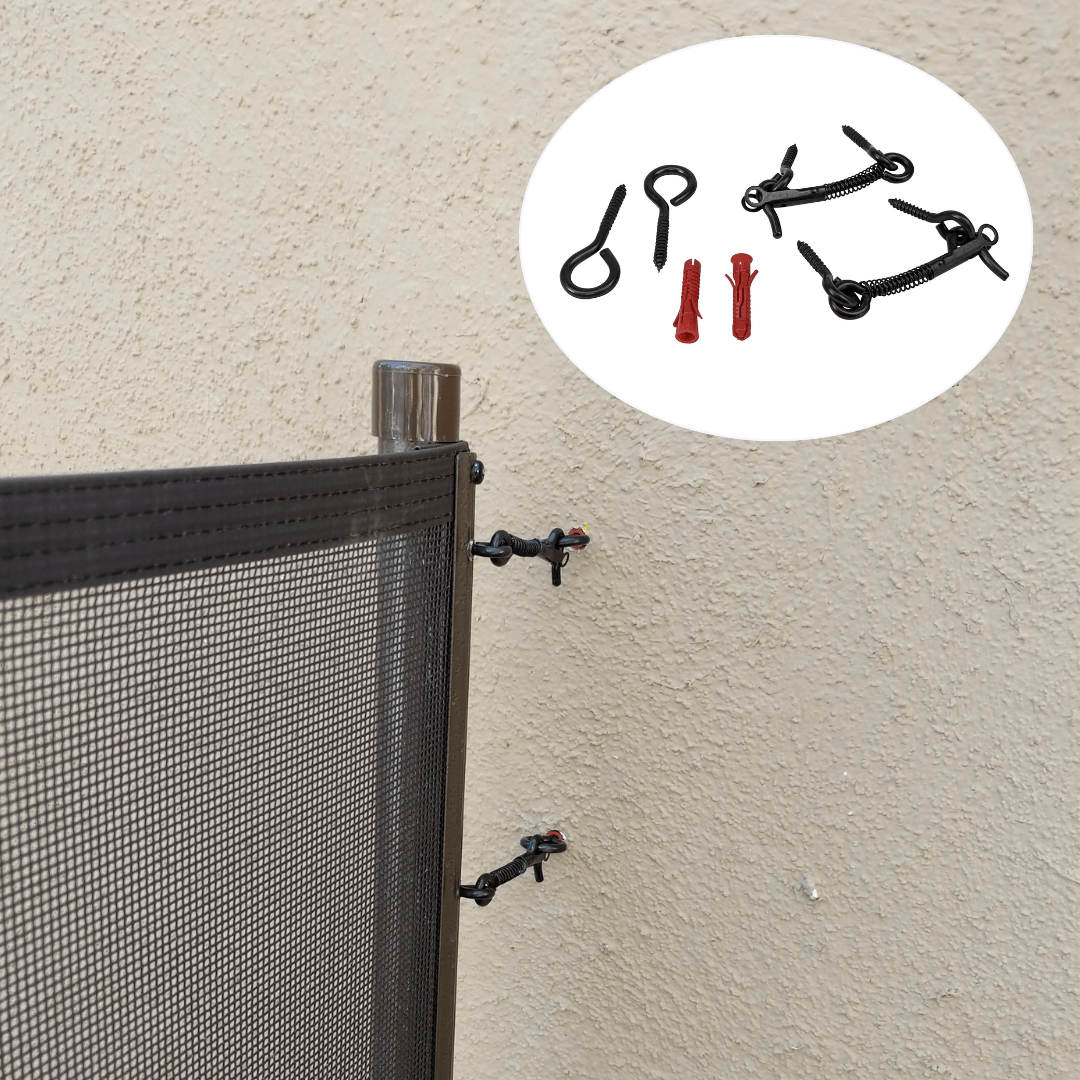
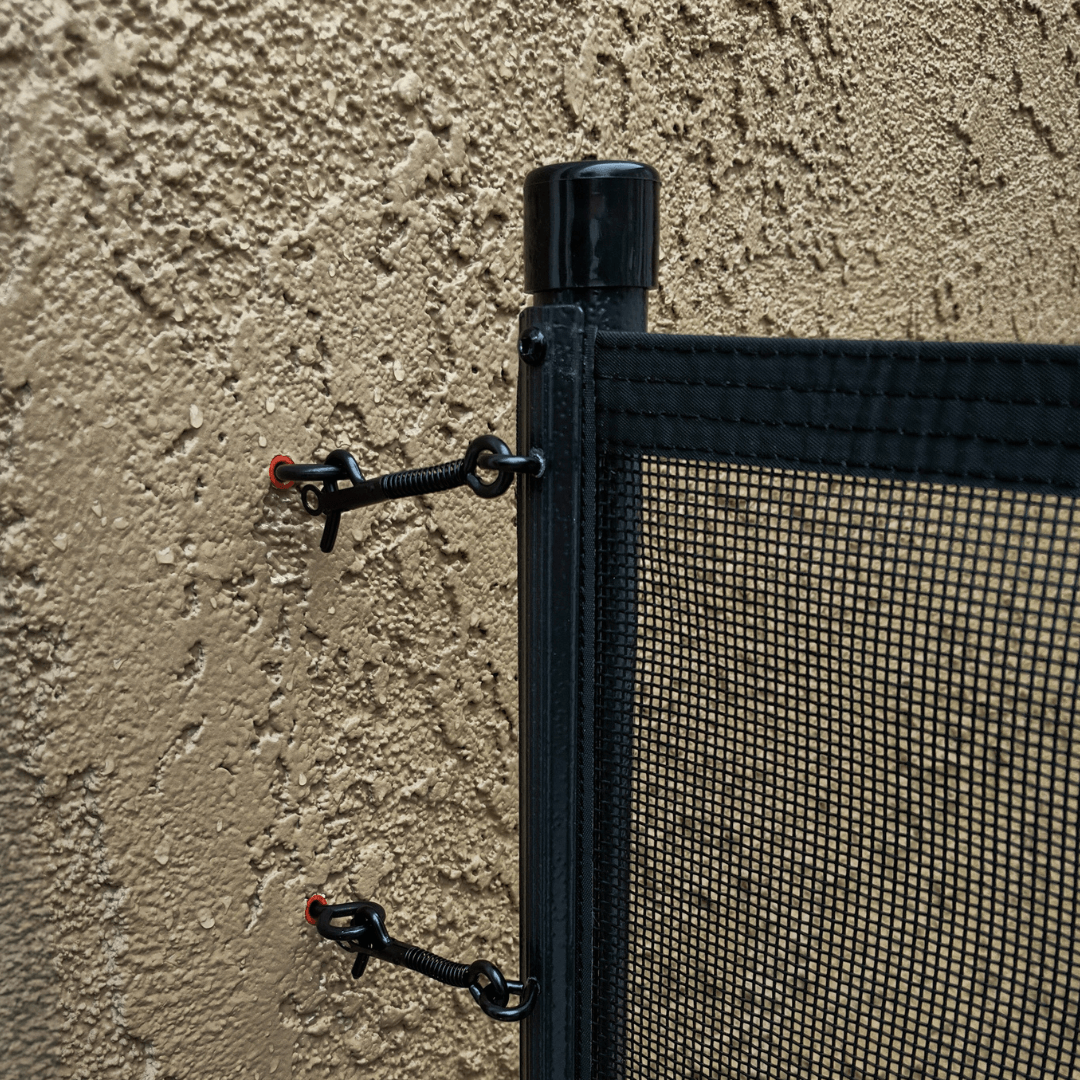
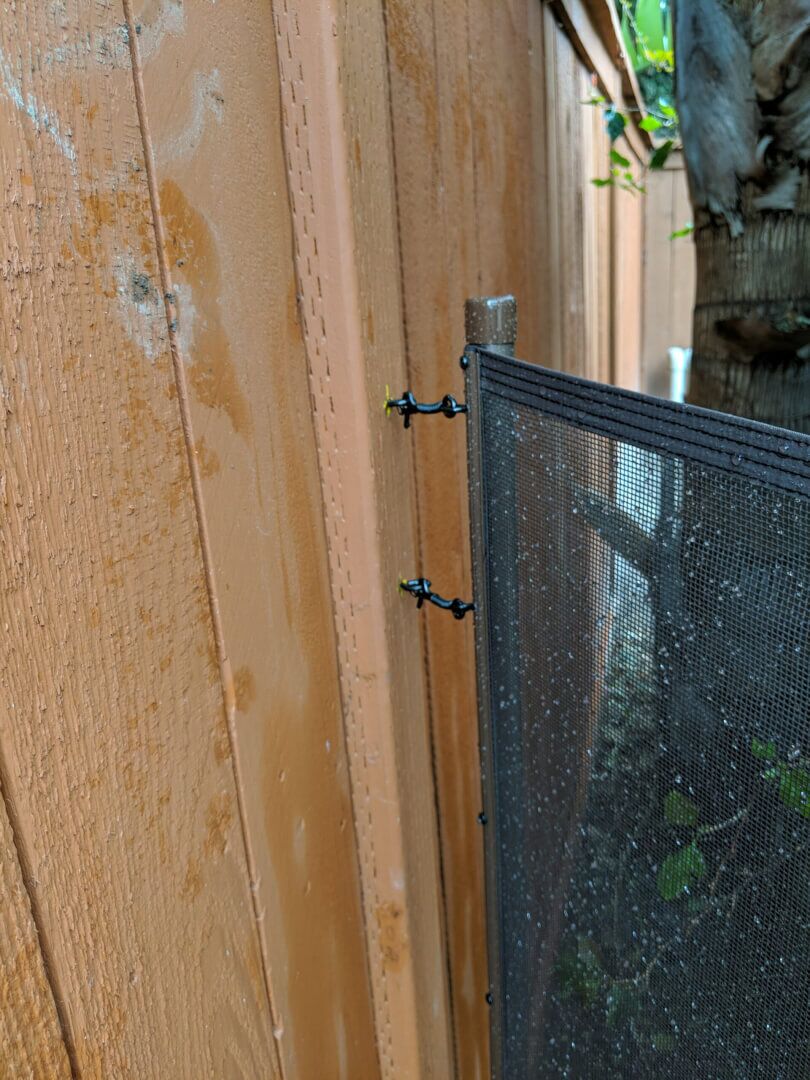
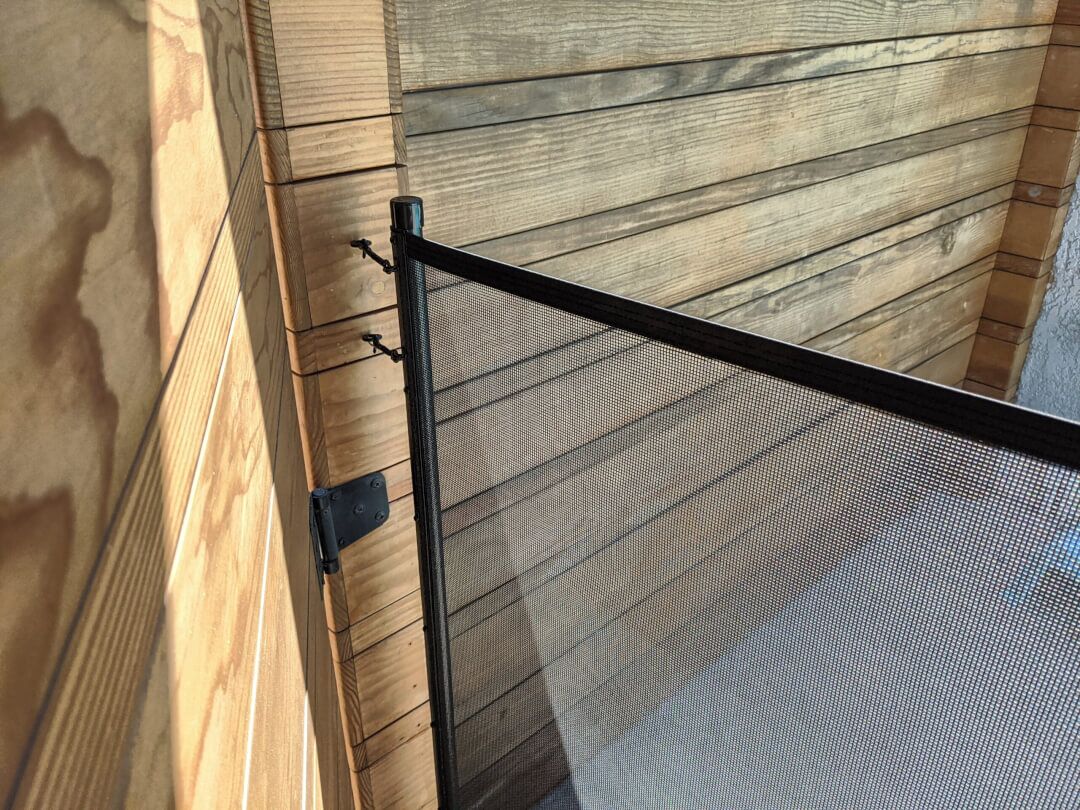
Wall Attachment Component Kit

Pool Fence Wall Attachment Kit

$10.00

Part #: Wall Attachment

Description

Introducing our Wall Attachment Component Kits, designed specifically for pool fences that need to be attached to walls such as brick, stucco, and more. Available in Black or Silver, each kit includes:

  • (2) Section Latches
  • (2) Large Eye Screw Anchors
  • (2) 1/2 Inch Eye Screws


Installation Instructions:

  1. Align the Fence: Using a level, ensure the end pole of your fence is straight. Mark the wall at the height of the second and third screw holes from the top of the end pole. The distance from the wall to the pole should be 2-3/4 inches.
  2. Drill Holes and Install Anchors: Drill the marked holes using a ¼” masonry bit. Insert and secure the wall anchors.
  3. Attach Eye Screws and Latch: Thread the eye screws into each wall anchor. Remove the second and third screws from the end pole, attach the section latch eye screw to the pole, and secure the latch to the wall eye screw.


Important Note:

Wall attachments are only as strong as the material they are installed into (e.g., block, wood, stucco). If not installed correctly or subjected to excessive force, the anchor may break away from the surface material, compromising the integrity of the attachment.


With our Wall Attachment Component Kits, you can ensure a secure and reliable installation for your pool fence, providing safety and stability for your outdoor area.

How to Install a Wall Attachment Kit Infographic

Only logged in customers can leave a review.

To accurately determine the amount of fencing required for your project, first calculate the total perimeter that needs to be enclosed. Once you have this measurement in feet, consult the chart provided below for guidance. Each section of our fence spans 15 feet, so dividing your total perimeter by 15 will give you the number of sections needed.

If your plan includes the installation of a Self-Closing Gate, remember that each gate occupies a space of 3 feet. Therefore, you should subtract 3 feet from the total fencing length to accommodate the gate. This adjustment ensures that you purchase the correct amount of fencing material, avoiding unnecessary expenses and ensuring a seamless installation.

Feet of Fence Needed Fence Sections Needed
1-15
1
16-30
2
31-45
3
46-60
4
61-75
5
76-90
6
91-105
7
106-120
8
121-135
9
136-150
10
151-165
11
166-180
12
181-195
13

Get Started!

Enter in your zip code to let us know where your pool is located.

Color Variations

Colors on your screen or brochure may not match the actual color of your product.

Due to the many variations in monitors, phones, and browsers, color samples and product examples may appear different on different screens. Computers and mobile devices are not all calibrated equally and color reproduction on the Internet is not precise. The same is true for printed items such as brochures and other sales literature. 

In addition, the colors of our products photograph differently under different lighting conditions. For example, photos taken in full sunlight will vary from photos taken on a cloudy or overcast day. Similarly, shadows from nearby objects can affect the color and transparency of our products. If a precise color or specific shade is important, please inspect the actual color of your product prior to installation.

Colors will vary from batch to batch.

Many of our products’ materials are not available through typical stores and vendors and therefore must be custom manufactured specifically for our use. In order to control costs and provide you with the best value possible, our raw materials are produced in large batches and can often take several months to receive. The colors of our materials can, and often do, vary slightly from batch to batch. Although we make every effort to minimize color variations, we cannot be responsible for these differences when they occur. If a precise color or specific shade is important, please inspect the actual color of your product prior to installation.

Color names are subjective and may not be what you think the color should be.

For example, we use the name “putty” to describe some of our products. Your idea of the color “putty” may be different than someone else’s idea of “putty”. In addition, products may have the same color name but may not be the exact same color. For example, we have different shades of “black”. Please do not order using color names as your only guide. If a precise color or specific shade is important, please inspect the actual color of your product prior to installation.

Inspect the actual color of your product prior to installation.

If it is important that your product be an exact color or shade, it is highly recommended that you inspect the actual product prior to its installation and address any concerns with your local independent installer. Most independent installers do not offer refunds or accept returns due to color variations.