Archives: Knowledge Base

Pages & Posts:

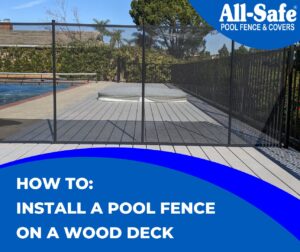
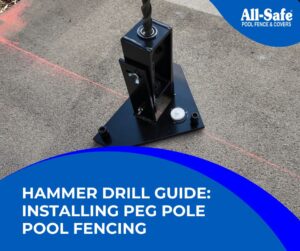
Hammer Drill Guide : Installing a Peg Pole Pool Fencing

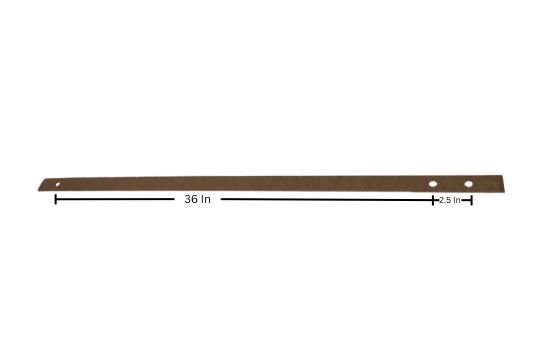
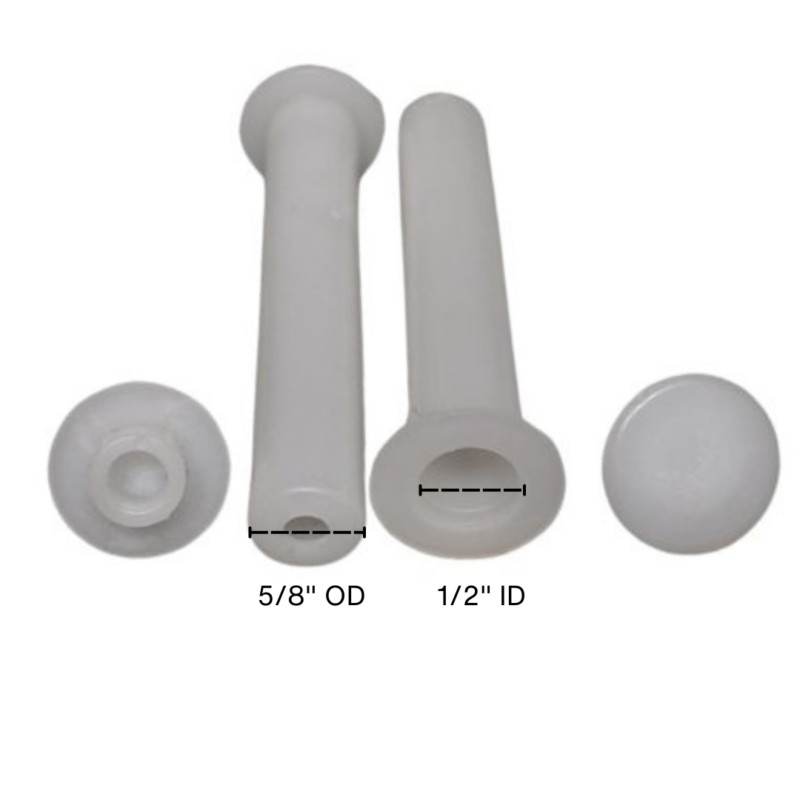
Whether you’re a seasoned professional in installation, just starting out in the industry, or diving into a DIY project, drilling the correct angled holes for a pool fence is crucial for both functionality and aesthetics. The Hammer Drill Guide presents the most cost-effective method for installing a removable pool fence. Let’s explore the steps for utilizing the Hammer Drill Guide effectively. Tools Needed No Lean Setting Starting with the guide’s first setting, we aim for drilling straight, or plumb, holes, referred to as NL (No Lean). This is essential when your fence is designed to follow a straight path, ensuring all holes are plumb, except for those designated for the gate, which we will discuss in more detail shortly. Installing Begin by inserting the ⅝ inch hammer drill bit through the bottom of the drill guide. Next, using a deck sleeve and a sharpie, mark the drill bit to indicate the required drilling depth, approximately 4 ½ inches. Before attaching the drill, place the guide over your mark. Use the three Allen bolts to adjust the guide, ensuring the bubble is centered for level drilling. This step should be repeated for each hole to ensure consistency. After attaching the drill,

Read More »

How To Install a Pool Fence on a Wood Deck

Wood or composite decks have challenges that are very different from other surfaces you will encounter on a typical pool fence installation. If you have a Wood Deck and are considering installing a Pool Fence, it may be possible. If you can access the joists under your deck, this is the best case scenario because you will need to install along the joists. We would recommend hiring a professional reseller/installer to do any pool fence installation in wood or composite decking. Tools Needed A typical core drill on a stand will be needed to drill plumb holes in the wood or composite deck. The drill should have the ability to accept: You should also use something like a piece of vinyl flooring or thick cardboard between your drill stand and the deck to keep from scratching or marring the customers deck. Pool Fence Material Needed If you can locate a joist that will span your layout, then you can use All-Safe’s pre-assembled, 36 inch spaced, 15 foot long, peg pole section of fence. If the structure of the deck is staggered and not hitting 36 inches on center, then you should assume that the fence will need to be built

Read More »
Wall Attachment Kit Hero

Attaching a Pool Fence to a Wall

If your pool fence is running from one wall to another or you need to terminate part of your pool fence at a wall, our wall attachment kit is here to help. Safety is essential when installing pool fences, so it’s crucial to ensure the surface you are installing into is strong and secure. We will show you the installation process step-by-step and share tips to ensure your wall attachment kit is properly installed. Available Wall Attachment Kits How to Infographic How to Video Gallery

Read More »
Round Terminating Post Hero

How to Install a Round Terminating Post & Sleeve

When No Solid Termination Structure Exists Round Terminating Posts are a key component to ensuring a proper and secure fence installation. If you are terminating a pool fence at a point where no solid structure is available or you cannot anchor into the available structure (like a glass wall, PVC fence, window, no wall at all) and your installation surface is dirt, you will need a Round Terminating Post. Please note: If the installation surface is concrete and you have no solid structure to anchor into to terminate the fence, see our Rectangular Post for this situation. The Round Terminating Post is designed to act as the secure structure for your fence and will hold the proper tension. The Post can be installed permanently with concrete or you can make the post fully removable using a Round Terminating Post Sleeve. Making Turns in Dirt/Grass You can also use a Round Terminating Post to make a turn in dirt/grass. Due to the fence tension, if you are planning on making turns in your fence while installing in dirt/grass you must use a Round Terminating Post. If you use a regular pole to complete a turn, the tension applied to that pole

Read More »

Products

Find a Local Installer

Enter your zip code to locate an independent installer in your area

Get Started!

Enter in your zip code to let us know where your pool is located.

Color Variations

Colors on your screen or brochure may not match the actual color of your product.

Due to the many variations in monitors, phones, and browsers, color samples and product examples may appear different on different screens. Computers and mobile devices are not all calibrated equally and color reproduction on the Internet is not precise. The same is true for printed items such as brochures and other sales literature. 

In addition, the colors of our products photograph differently under different lighting conditions. For example, photos taken in full sunlight will vary from photos taken on a cloudy or overcast day. Similarly, shadows from nearby objects can affect the color and transparency of our products. If a precise color or specific shade is important, please inspect the actual color of your product prior to installation.

Colors will vary from batch to batch.

Many of our products’ materials are not available through typical stores and vendors and therefore must be custom manufactured specifically for our use. In order to control costs and provide you with the best value possible, our raw materials are produced in large batches and can often take several months to receive. The colors of our materials can, and often do, vary slightly from batch to batch. Although we make every effort to minimize color variations, we cannot be responsible for these differences when they occur. If a precise color or specific shade is important, please inspect the actual color of your product prior to installation.

Color names are subjective and may not be what you think the color should be.

For example, we use the name “putty” to describe some of our products. Your idea of the color “putty” may be different than someone else’s idea of “putty”. In addition, products may have the same color name but may not be the exact same color. For example, we have different shades of “black”. Please do not order using color names as your only guide. If a precise color or specific shade is important, please inspect the actual color of your product prior to installation.

Inspect the actual color of your product prior to installation.

If it is important that your product be an exact color or shade, it is highly recommended that you inspect the actual product prior to its installation and address any concerns with your local independent installer. Most independent installers do not offer refunds or accept returns due to color variations.